There are already thousands of tutorials available on the web for doing this exercise. There are thousands of videos on YouTube also. Each one claims that, the exercise will result into a small database. But they use a lot of code and a lot of columns in their example and generally those types of code and columns results into confusion for any new programmer. So I am going to explain you ‘How to create your first database VB app’. In this tutorial, we will create a small database i.e. we will create an address book with only three columns (ID, Name, City). Rest all steps will be performed by drag and drop, no coding is needed.
This tutorial is quite simple and will help you a lot.
Steps:
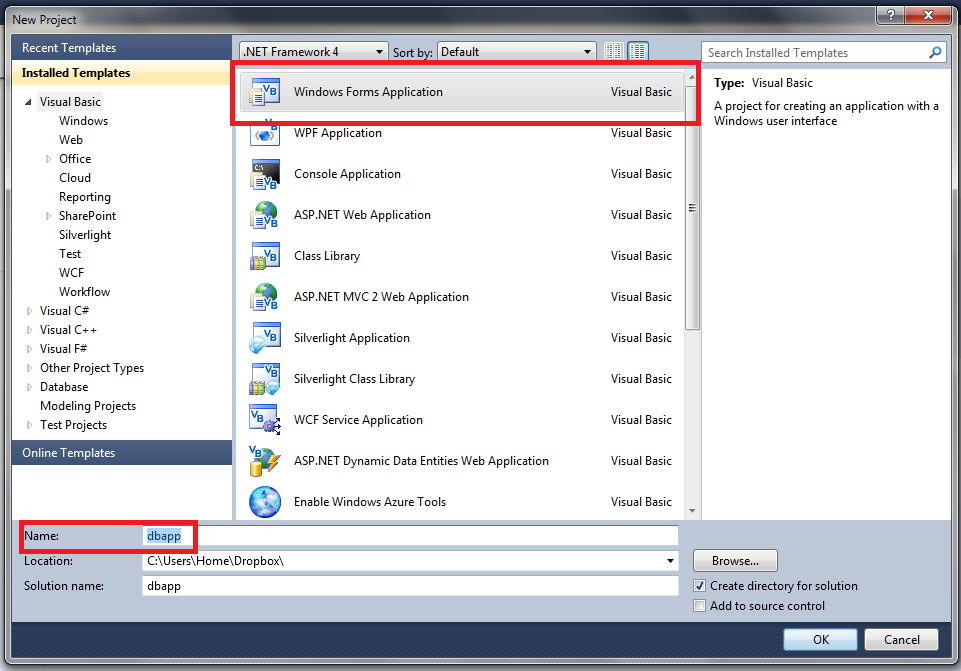
Since we are building application with Windows Form Control, we will use ‘Windows Forms Application’ as our template.
We have given name as ‘dbapp’. You can choose anything as name.
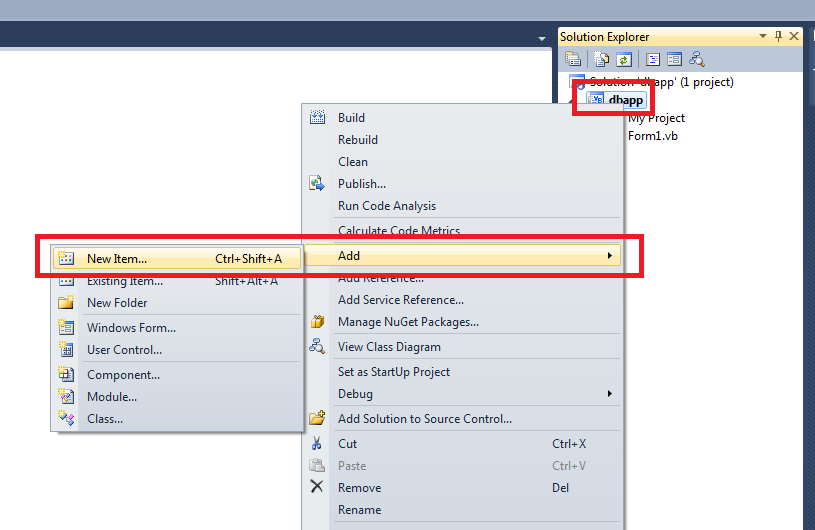
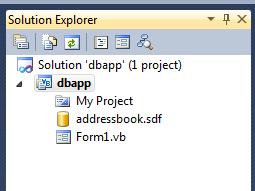
Now you will see a blank form on your screen. Now head towards Solution Explorer & you will see your project name. Here since we have used dbapp as name, you can see dbapp (Highlighted in red) in following screenshot.
Now you need to add a database in your project. This is quite simple. Right Click on your project name (Here in this case ‘dbapp’) then select Add and them select New Item.
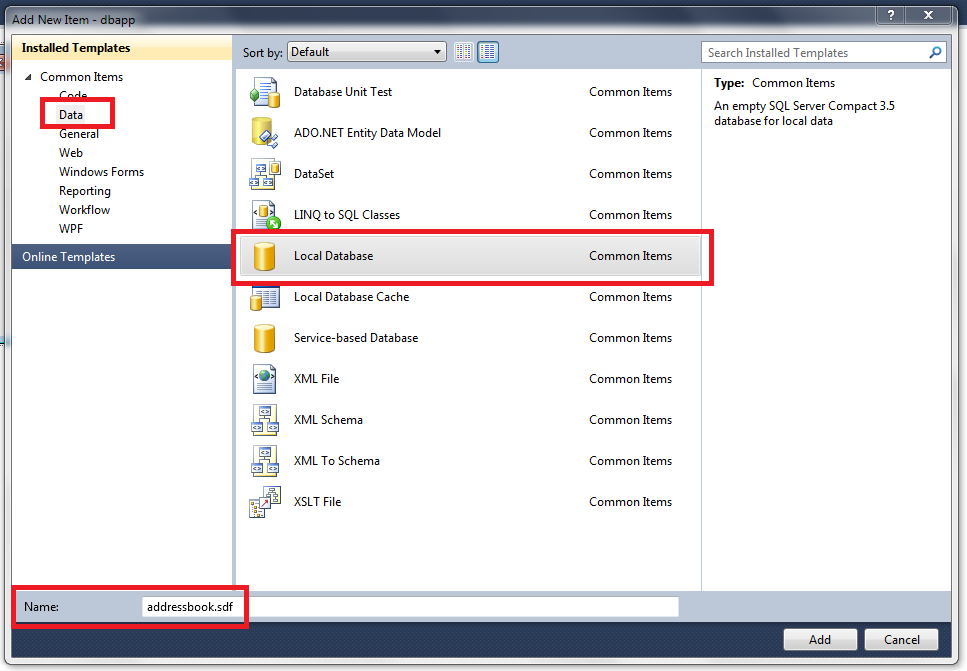
Since the app is going to store data locally on the machine, we will use local database. First select data from left pane then select ‘Local Database’ from middle pane. Since we are going to develop an app on Address Book, we named our database as ‘addressbook’. Once you are done with this, click on Add button.
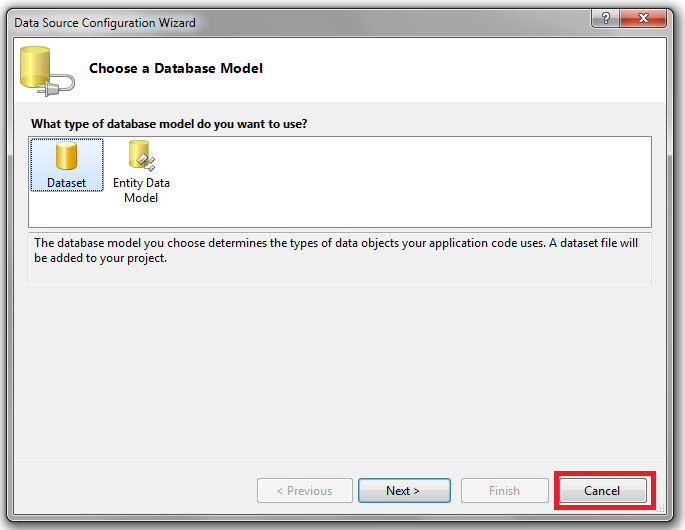
Now you can see ‘addressbook.sdf’ as database in your solution explorer (i.e. in your project). Once you added the database Data Source Configuration Wizard will open automatically.
You have added a database right now, but it is empty. Hence select ‘Cancel’. You can use this wizard once you finished adding data to your database.
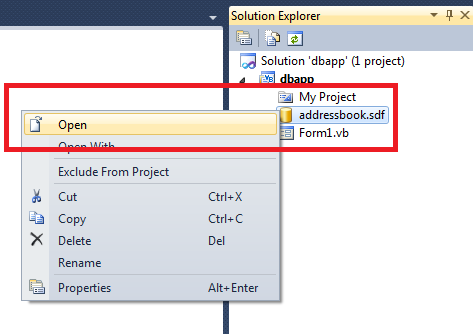
Now right-click on your database from solution explorer and select Open from menu.
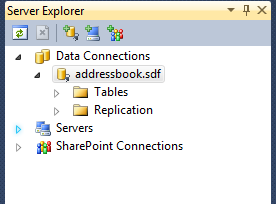
Server Explorer tab will open on left side of your screen from where you can see content of your database. As shown in above screenshot ‘addressbook’ contains two folders, Tables and Replication.
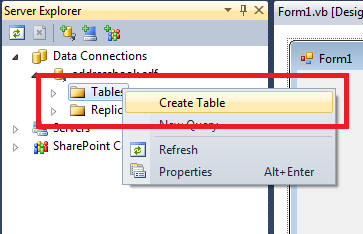
For adding data in database a table is required. Right click on ‘Tables’ from server explorer and then select ‘Create Table’ from menu.
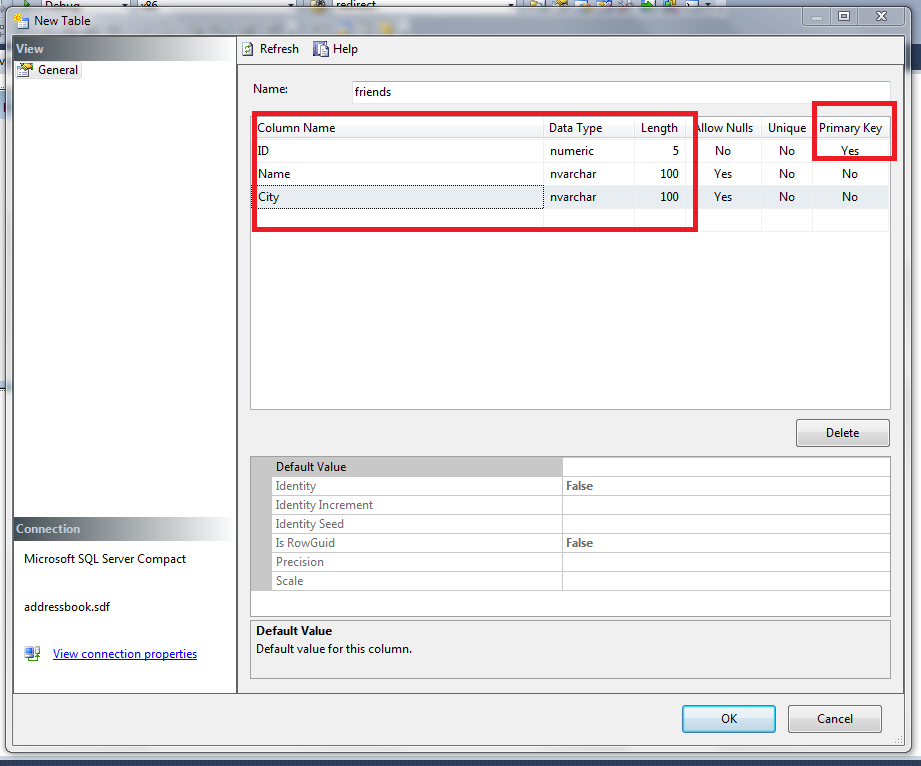
Now you are ready to create table in your database. Since we are creating database on Address Book, we will use friends as our table name. As said earlier, we have three columns in our table as follows
ID : Type – Numeric and Primary Key of table
Name : Type – nvarchar (Text)
City : Type – nvarchar (Text)
You can clearly see in above screenshot, All columns, their respective datatypes and lengths and also ‘Primary key’ is set as ‘Yes’ to ID column.
Once you are done with this click on OK.
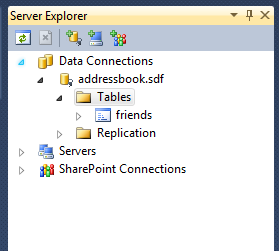
Now you can see, ‘friends’ table is created. Now you are with a database and a table in it. But still there is no data in this table. Now in next step we will fill this table with some data.
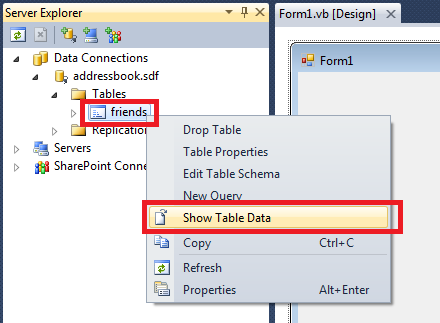
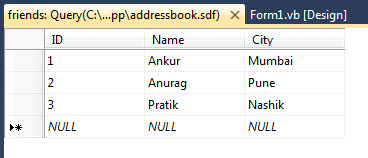
Now right-click on ‘friends’ table and select ‘Show Table Data’ from menu. Once you select the option you will see a blank table with columns as ID, Name and City as shown in following screenshot.
Now start adding some data in it. Just click on field and enter data. The data will be saved automatically each time when ever you navigate to a different field. So no need to keep on hitting Ctrl+S.
Once you added data in table, it will look somewhat similar to above screenshot. Now you are ready with a database with a table and few records in it. Now you have to connect you database to your app.
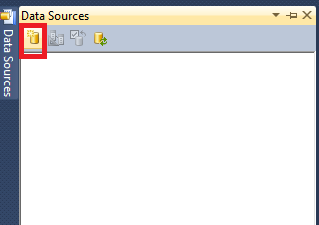
For connecting database, go to ‘Data Source’ Tab which is situated at left side of your screen. If you cannot find ‘Data Source’ tab then enable it from ‘Data’ menu. Select ‘Add new data source’, first icon from pane.
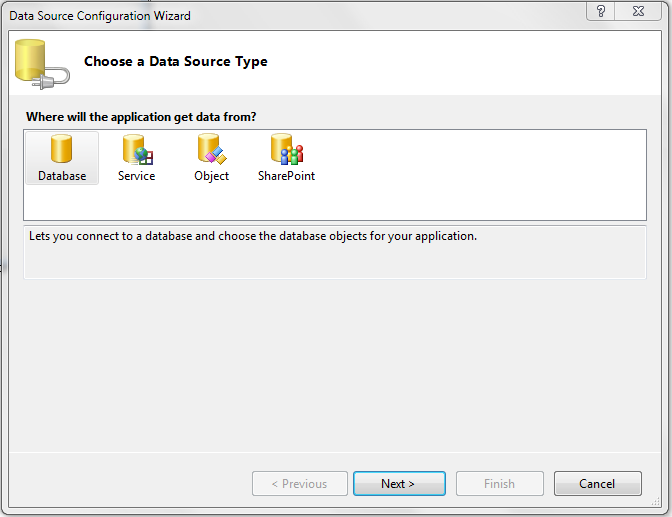
Data Source Configuration Wizard will open on your screen. This wizard we have canceled at initial steps because at that time our database was blank. But now we added a few records in our database we are ready to connect database to our app.
Select Database and then click on Next.
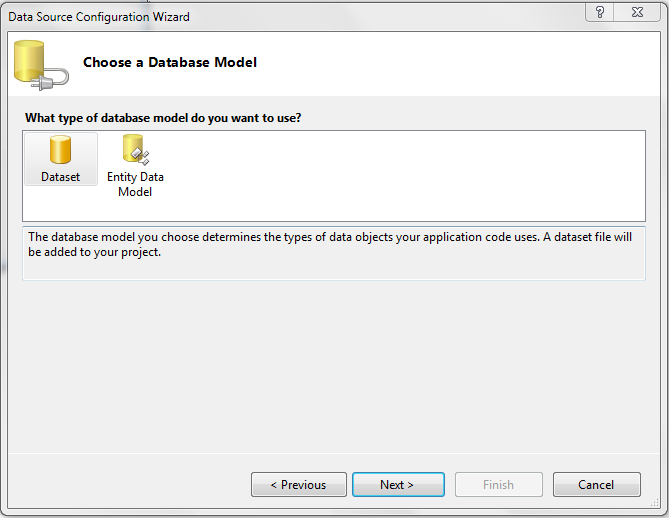
We are going to use Dataset as our database model. Select Dataset and then click on Next. In next window you have to select database which you want to connect to your app.
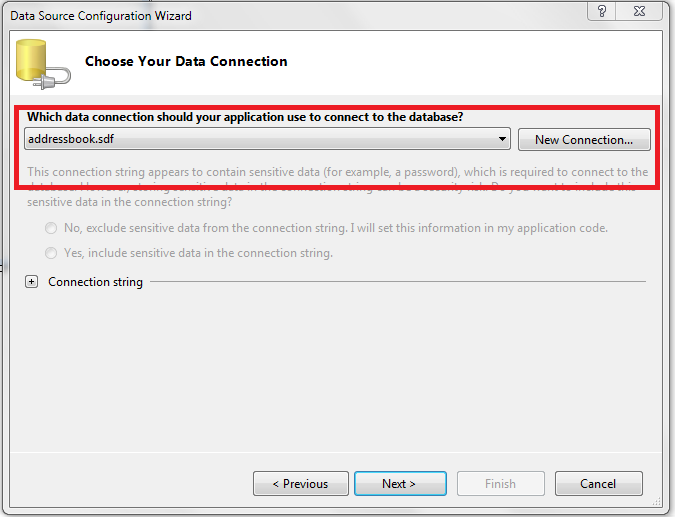
Till now as you have created only one database, the Data Source Configuration Wizard will automatically select it for connection., As you can see in above screenshot ‘addressbook.sdf’ is selected automatically. Once you clicked on next button, wizard will ask you for connection name.
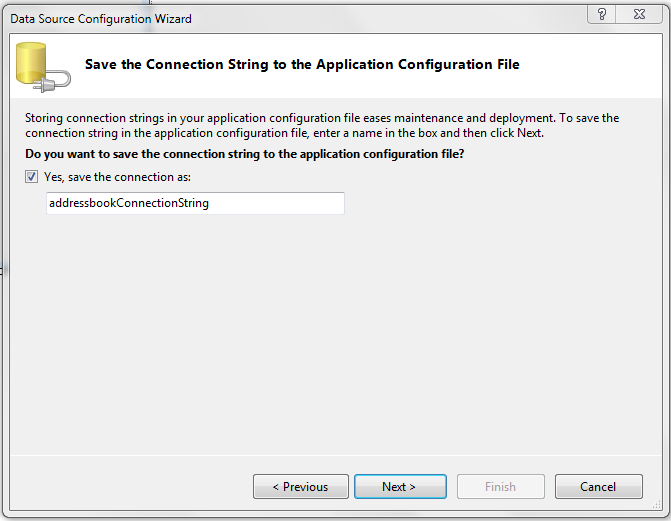
As shown in above screen shot, wizard will suggest you a connection name automatically. You can change it with your own desired connection string, but for now we will use default, automatically generated connection string. In next step you have to select database objects which you want in your Dataset.
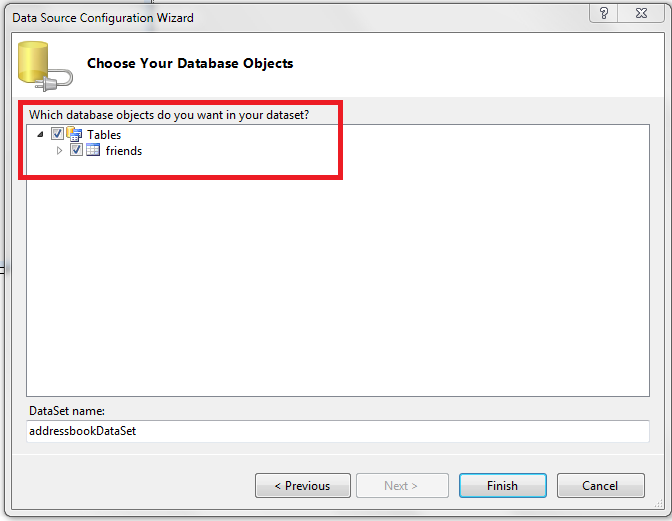
As you have created only one table in your database, you will see one table in the wizard as shown in above screenshot. You can customize selection according to your requirements but for now we will select everything. Just tick the check box which is in front of Tables. You can also give name to Dataset also, but for now we will use default one. Click on finish button once you done with all.
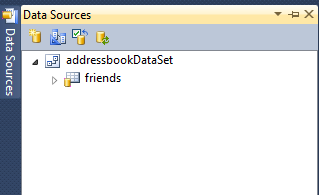
Now look in Data source pane, you will find that your newly created dataset is added in it. That means you have connected your database and now you are ready to work with it.
Now you are done with connecting database to your app. Now next step is making an interface for app. The interface can be designed in infinite number of ways according to requirements but rather than making it complex, we will design a simple interface. Just navigate to your form designer. If it is too small, consider to increase its size.
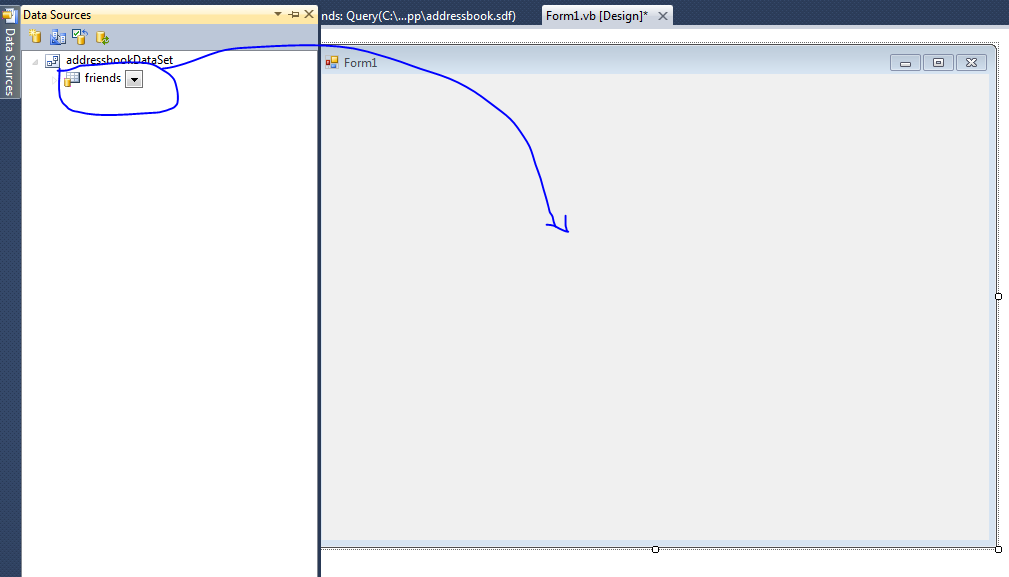
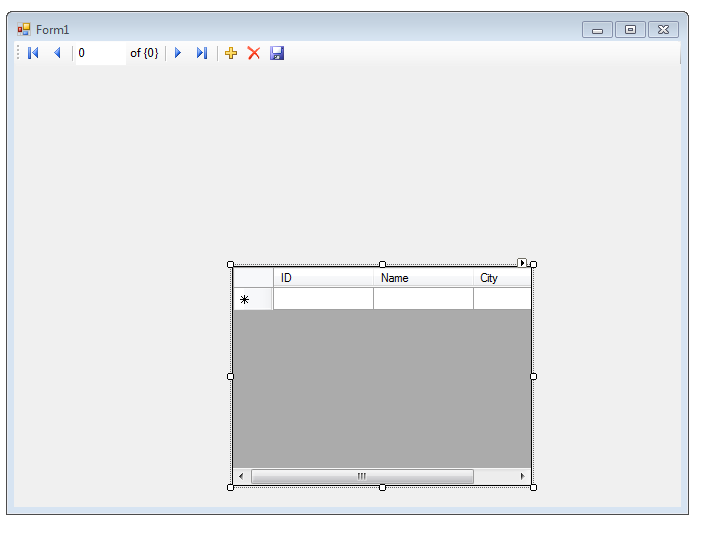
You can see in above screenshot, the size of form is increased. Now from Data Source pane select friends table and drag it on your form. Once you release the mouse button, you will see that all database controls are added on your form.
Now you can see all controls are arranged in random order. Rearrange them and make your form pretty.
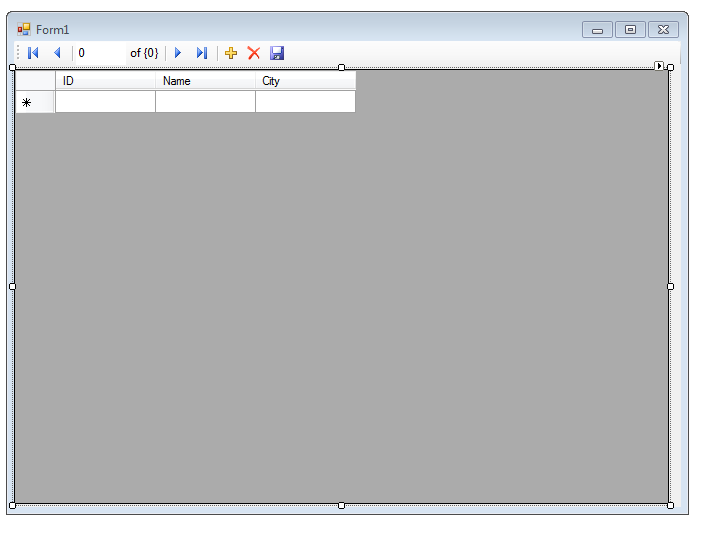
In above screenshot, you can see all controls are properly arranged. That’s all. Your project is complete. This is how we have connected a database to our VB application.
Now run the project.
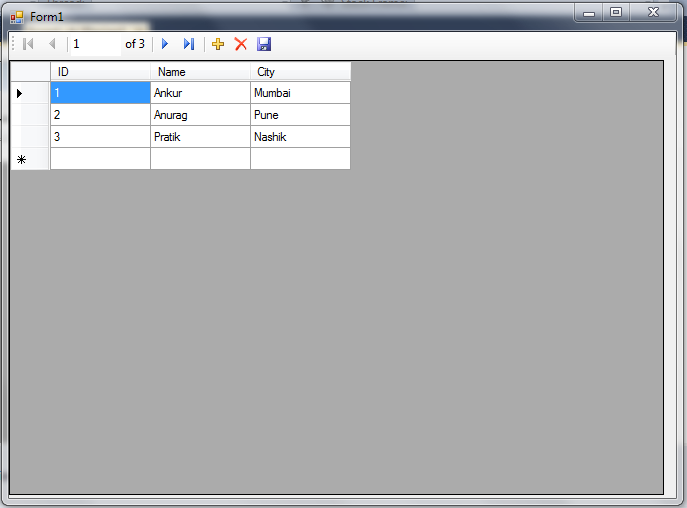
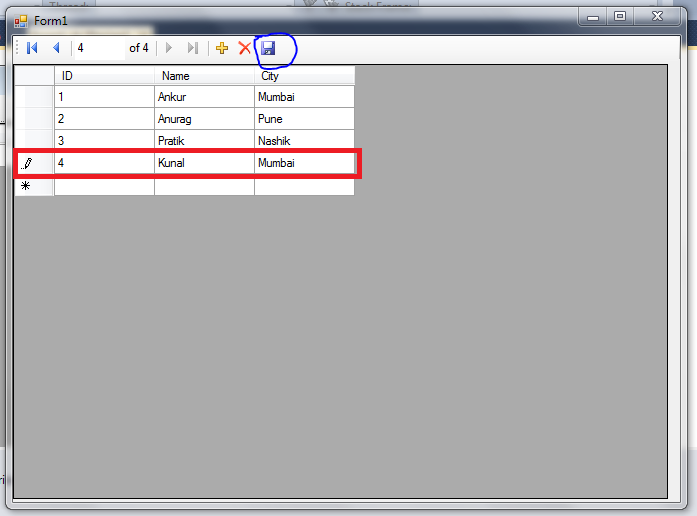
You will see all data that we have already entered while creating tables is already there. You can traverse, modify and even add more record while running the project. Just click on blank white space and cursor will appear on your screen.
Here in above screen shot you can see that, I have added new record. Once you are done with adding hit save button and your record will be saved in database.
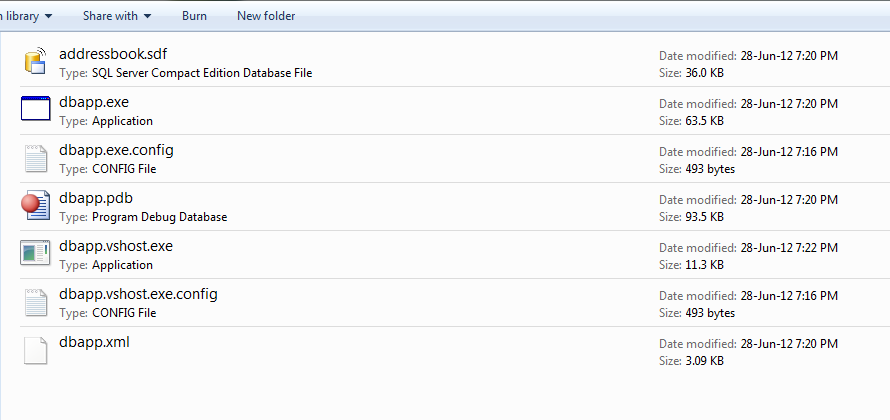
Just look into your debug folder. You will find a database file. (Here in above screenshot you can see ‘addressbook.sdf’). This database file will contain all data whatever we stored in this app.
That’s all. This is how you can connect a database to your VB application.


Wonderful information.Thanks fro sharing it 🙂
thanks for good understanding
Hi, do you have tutorial on how to add data to local database without using the binding navigator? I wanted it to be just buttons where I can save my data, edit or delete it. I needed it badly. Thank you
Hi Bryan have you had any success in getting into your project?
helpful information thanks
Wonderful website. Plenty of helpful information here. I am sending it to some pals ans
also sharing in delicious. And naturally, thanks for your sweat!
pretty useful for a beginner like me.