
This is a quick tutorial for consuming services exposed by one Eureka client application in another Eureka client application. This tutorial has the prerequisite of a running Eureka server and a Eureka client application as well. In case if you do not have Eureka server or a Eureka client application, check out my previous posts in this series which explains how to setup eureka server and how to develop a eureka client application.
The eureka client which we will be developing in this tutorial will be registered in eureka server and will consume service exposed by another client application.
TL;DR You can download whole project by clicking following link.
To give you a brief idea about what we are developing… We will be creating a Eureka client in this tutorial. The client will be a spring boot application and will expose one rest endpoint. The client will also internally consume service exposed by another eureka client application.
This post is a part of following series.
- Part 1 – Setting Up Eureka Server Using Spring Cloud
- Part 2 – Developing a Eureka client and registering it with Eureka Server.
- Part 3 – Developing Eureka client and consuming service exposed by another Eureka client.
Time needed: 20 minutes.
We will be following few simple steps to build our application:
- Creating a new Maven Project
We will be creating a new maven project in this step.
- Adding required dependencies
We will be adding a required dependency in our pom.xml. In this case, it will be ‘spring-cloud-starter-netflix-eureka-client’.
- Adding spring boot runnable class
This step will make our application runnable
- Adding rest controller in our service
We will add a rest controller in our service. This rest controller will consume service exposed by another eureka client.
- Adding properties file for spring
We will configure some properties in this section to register or application with the eureka server.
For this tutorial, we will be creating a Maven Project. To keep thing more simple, you may proceed with a simple maven project.
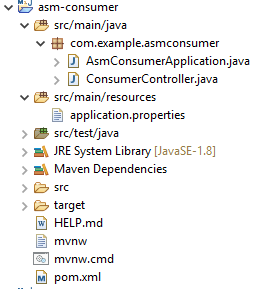
Our project structure is given below. We will be creating three files which are as follows:
- AsmConsumerApplication.java – Spring boot run–able file
- ConsumerController.java – Rest controller
- application.properties – Spring properties file
Let’s start by adding the required dependencies. Replace content in pom.xml file with the following content. Don’t forget to update the project using Maven > Update option. That will download all the necessary dependencies.
<?xml version="1.0" encoding="UTF-8"?>
<project xmlns="http://maven.apache.org/POM/4.0.0"
	xmlns:xsi="http://www.w3.org/2001/XMLSchema-instance"
	xsi:schemaLocation="http://maven.apache.org/POM/4.0.0 https://maven.apache.org/xsd/maven-4.0.0.xsd">
	<modelVersion>4.0.0</modelVersion>
	<parent>
		<groupId>org.springframework.boot</groupId>
		<artifactId>spring-boot-starter-parent</artifactId>
		<version>2.3.1.RELEASE</version>
		<relativePath /> <!-- lookup parent from repository -->
	</parent>
	<groupId>com.example</groupId>
	<artifactId>asm-consumer</artifactId>
	<version>0.0.1-SNAPSHOT</version>
	<name>asm-consumer</name>
	<description>Consumer</description>

	<properties>
		<java.version>1.8</java.version>
		<spring-cloud.version>Hoxton.SR6</spring-cloud.version>
		<maven-jar-plugin.version>3.1.1</maven-jar-plugin.version>
	</properties>

	<dependencies>
		<dependency>
			<groupId>org.springframework.cloud</groupId>
			<artifactId>spring-cloud-starter-netflix-eureka-client</artifactId>
		</dependency>

		<dependency>
			<groupId>org.springframework.boot</groupId>
			<artifactId>spring-boot-starter-web</artifactId>
		</dependency>

		<dependency>
			<groupId>org.springframework.boot</groupId>
			<artifactId>spring-boot-starter-test</artifactId>
			<scope>test</scope>
			<exclusions>
				<exclusion>
					<groupId>org.junit.vintage</groupId>
					<artifactId>junit-vintage-engine</artifactId>
				</exclusion>
			</exclusions>
		</dependency>
	</dependencies>

	<dependencyManagement>
		<dependencies>
			<dependency>
				<groupId>org.springframework.cloud</groupId>
				<artifactId>spring-cloud-dependencies</artifactId>
				<version>${spring-cloud.version}</version>
				<type>pom</type>
				<scope>import</scope>
			</dependency>
		</dependencies>
	</dependencyManagement>

	<build>
		<plugins>
			<plugin>
				<groupId>org.springframework.boot</groupId>
				<artifactId>spring-boot-maven-plugin</artifactId>
			</plugin>
		</plugins>
	</build>

</project>
Create file AsmConsumerApplication.java and add the following content. This file will serve as the entry point for our application.
package com.example.asmconsumer;

import org.springframework.boot.SpringApplication;
import org.springframework.boot.autoconfigure.SpringBootApplication;
import org.springframework.cloud.client.discovery.EnableDiscoveryClient;

@EnableDiscoveryClient
@SpringBootApplication
public class AsmConsumerApplication {

	public static void main(String[] args) {
		SpringApplication.run(AsmConsumerApplication.class, args);
	}

}
Create file ConsumerController.java and add the following content. This will be our rest controller and will have endpoint related stuff.
package com.example.asmconsumer;

import org.springframework.beans.factory.annotation.Autowired;
import org.springframework.http.ResponseEntity;
import org.springframework.web.bind.annotation.GetMapping;
import org.springframework.web.bind.annotation.RestController;
import org.springframework.web.client.RestTemplate;

import com.netflix.appinfo.InstanceInfo;
import com.netflix.discovery.EurekaClient;
import com.netflix.discovery.shared.Application;

@RestController
public class ConsumerController {

	@Autowired
	private EurekaClient eurekaClient;

	@GetMapping("/sayhello")
	public String letsSayHello() {
		Application application = eurekaClient.getApplication("ASMProducer");
		InstanceInfo instanceInfo = application.getInstances().get(0);
		String hostname = instanceInfo.getHostName();
		int port = instanceInfo.getPort();

		RestTemplate restTemplate = new RestTemplate();
		String resourceUrl = "http://" + hostname + ":" + port + "/hello";
		ResponseEntity<String> response = restTemplate.getForEntity(resourceUrl + "/Ankur", String.class);

		return response.getBody();
	}

}
In this case, if you check line no 21 i.e. highlighted line in the above code, I have passed ‘ASMProducer’ to function. This is nothing but the spring application name of the service whose endpoint you want to consume. If you remember in our last tutorial we created a eureka client with name ‘ASMProducer’. That client we will be using here.
Under resources folder create a file with name application.properties and add the following content.
spring.application.name=ASMConsumer
eureka.client.serviceUrl.defaultZone=http://localhost:11800/eureka
server.port=11802
We have specified three properties over here. Those are as follows:
- spring.application.name – Our application name. You will find this in the eureka dashboard.
- eureka.client.serviceUrl.defaultZone – Url of the eureka server.
- server.port – The port which our server will use.
Now you can run AsmConsumerApplication.java. This will start the server. Once the server is started it will register automatically itself to the eureka instance. You can now refresh your eureka dashboard and you should able to see this server under ‘Instances currently registered with Eureka’ section.

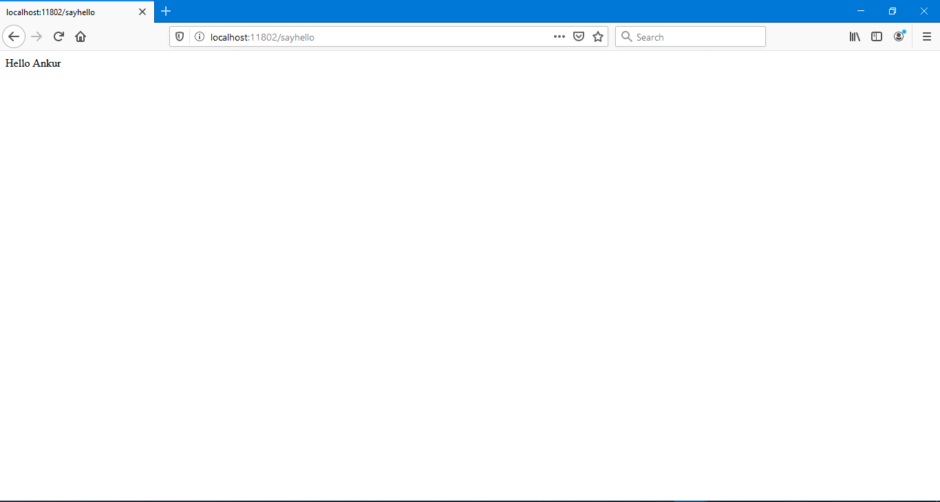
Let’s see if we can invoke our service or not. For that, you will need to navigate to ‘http://localhost:11802/sayhello’ URL. This rest controller will internally invoke rest controller of another service and will return you the result.
In this case, if you check on line 28 of ConsumerController we have hardcoded ‘/Ankur’ after resource URL. You can change this string to whatever you like and the application should greet you.
FAQ:
Make sure that you have prefixed it with ‘/’ for e.g. ‘/Ankur’ or ‘/Alex’. This is required to create correct URL.
Downloads: