
Angular’s structural directives are essential tools for dynamically shaping your templates. They control the very structure of the DOM by adding or removing elements based on conditions. Angular 17 provides three fundamental structural directives: *ngIf for conditional rendering, *ngSwitch for displaying elements based on multiple cases, and *ngFor for efficiently iterating and displaying lists of data. Understanding these directives is crucial for building dynamic and data-driven Angular applications. Let’s explore each of these powerful tools and see how they can transform your templates!
Category Archives: Angular
🔗Data binding in Angular: Property binding, and event binding
Beyond interpolation, Angular offers more powerful data binding techniques: property binding and event binding. Property binding enables one-way flow of data from your component to the template, dynamically setting HTML element properties like src, value, disabled, and more. Conversely, event binding handles user interactions and events in the template, flowing data back to your component to trigger actions. Together, property and event binding form the backbone of interactive Angular applications, allowing seamless communication between your component logic and the user interface, creating truly dynamic experiences. Let’s dive into each of them!
🔗Data binding in Angular: String Interpolation
Angular makes dynamic web pages a breeze with data binding, a powerful mechanism that connects your component’s data to the HTML template. Interpolation is the simplest form of one-way data binding in Angular. Using the “moustache” syntax {{ }} in your HTML, you can effortlessly display component properties directly in the view. Angular will automatically update the template whenever the component data changes, creating dynamic and interactive user interfaces. Interpolation is perfect for displaying text, numbers, and other simple values, bringing your component’s data to life in the template. Let’s explore how this works!
Understanding Angular components: Templates, styles, and classes
Angular components are indeed the fundamental building blocks of Angular applications. They are self-contained, reusable units that manage a specific part of the user interface and its associated logic. Let’s break down the three key parts in more detail:
TypeScript Class: This is the brain of your component.
- It’s where you write the logic that controls the component’s behavior.
- It defines the data the component uses (properties).
- It handles user interactions and events (methods).
- Decorators like @Component attach metadata, linking the class to the template and styles.
- It’s written in TypeScript, allowing for strong typing and better code organization.
Creating your first Angular application: Hello World
Alright, let’s dive into the exciting world of Angular! Today, we’re going to build your very first Angular application, the classic “Hello World,” and explore the project structure that makes it all tick. Get ready to code, learn, and have some fun!
Prerequisites:
Before we begin, make sure you have the following installed:
Node.js and npm: Angular relies on Node.js and its package manager, npm. You can download them from the official Node.js website.
Angular CLI (Command Line Interface): The Angular CLI is a command-line tool that makes it easy to create, develop, and maintain Angular applications. Install it globally using npm:
npm install -g @angular/cli
Step 1: Creating a New Angular Project
Open your terminal or command prompt.
Navigate to the directory where you want to create your project and run the following command to create a new Angular project:
ng new hello-world

Setting up your Angular development environment
Hey there, fellow coders! Ever wanted to build amazing web applications with Angular but felt a bit overwhelmed by the setup process? Don’t worry, you’re not alone! Today, we’re going to walk through setting up your local environment, making it as easy as pie.
What You’ll Need Before We Begin
Before we jump into the nitty-gritty, let’s make sure you’re familiar with a few basics:
- JavaScript, HTML, and CSS: These are the building blocks of web development. A solid understanding of these will make your Angular journey much smoother.
- Command Line Interface (CLI): You’ll be using commands in your terminal or command prompt. Don’t worry, we’ll guide you through them.
- TypeScript (Optional): Angular is built with TypeScript, which adds static typing to JavaScript. While it’s helpful, you can start without deep knowledge.
Let’s Get Started: Dependencies and Installation
1. Node.js and npm:
Angular CLI relies on Node.js and npm (Node Package Manager).
Head over to the official Node.js (https://nodejs.org/en) website and download the latest LTS (Long Term Support) version by clicking Download Node.js button.
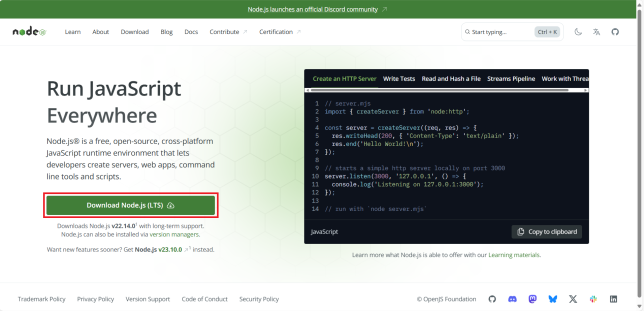
Once it is downloaded, double click on the downloaded file to start its installation. Installing Node.js will automatically install npm.
As stated in the angular documentation, it is important to use an active or maintenance LTS version of node.js. Please refer to the angular version compatibility guide for more details.
Continue reading Setting up your Angular development environment