
Whether you’re writing a simple document, designing a poster, or building a website, typography is absolutely crucial. The right font can completely change the attractiveness and vibe of your work. We all know the classic staples—Times New Roman, Arial, and the rest. They come pre-loaded on your operating system or bundled with your office apps. But because they’re everywhere, they can start to feel a bit boring and uninspired. If you look closely, they don’t really add any unique character to your designs.
So, What’s the Alternative?
You have plenty of options out there. A quick search will bring up tons of font websites, but you’ll quickly run into a major hurdle: the best fonts aren’t free. And the free ones? They often aren’t very interesting. That’s where Google Web Fonts comes to the rescue. It’s a fantastic, massive, and completely free collection of high-quality typography.
You can check it out right here:
google.com/webfonts
A Quick Introduction to Google Web Fonts

Hosted by Google, this font gallery contains thousands of free web fonts. The collection is huge—over 700 MB and constantly growing. The best part? Every single font is open source. You don’t have to pay a dime, and you don’t need to ask for permission. You’re completely free to download, distribute, and use them anywhere you want, whether it’s for a personal blog or a commercial project.
How Do You Use Them?
So you’ve found a font you absolutely love and want to use it in your next document. Here’s a quick step-by-step guide on how to grab it:
- Find the font you want to use.
- Add it to your collection.
- Download the collection to your PC.
- Unzip the downloaded file and install the fonts.
Let’s Walk Through an Example
Let’s say you want to download a font called Telex.
Step 1: Navigate to the directory at http://www.google.com/webfonts.
Step 2: Use the search bar on the left-hand side to look up Telex.
Step 3: Click the “Add to Collection” button to save it.
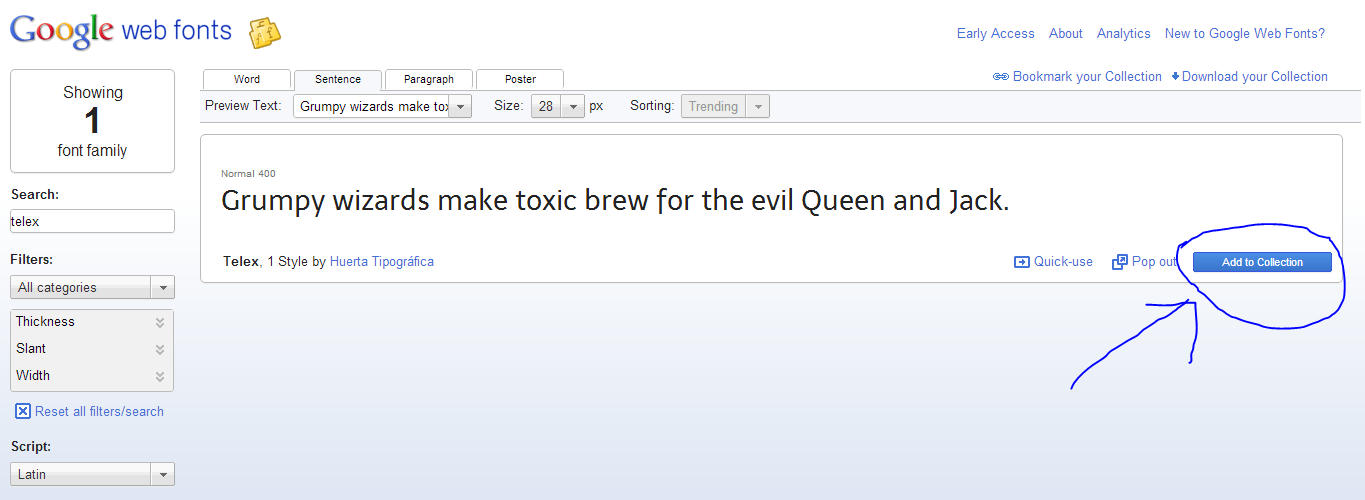
Step 4: Click the download option at the top right corner of your screen to save your collection to your computer.
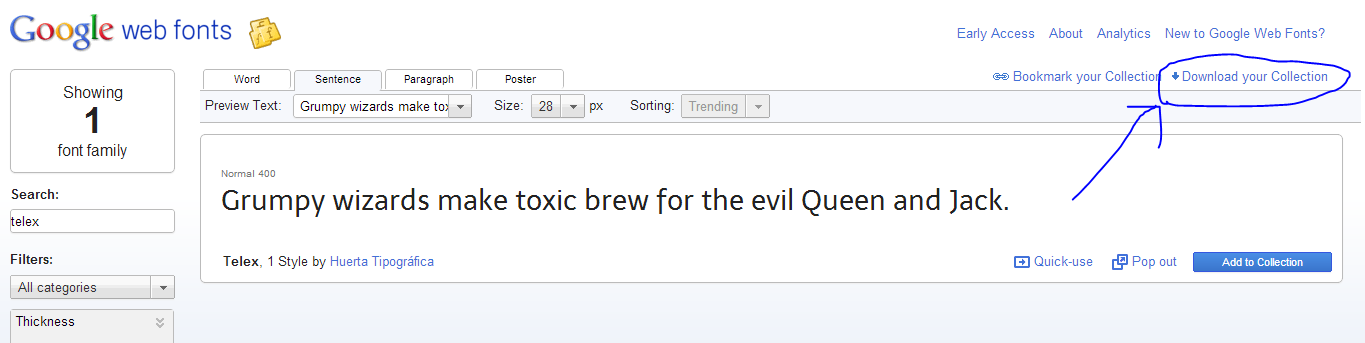
Once the zip file is downloaded, extract it. Open the font files one by one and hit “Install.” You’re all set!
Using Google Web Fonts On Your Website
Using these fonts on a website is incredibly straightforward. Let’s stick with our Telex example.
- Visit the Web Font Gallery.
- Choose your font.
- Click on Quick Use.

Google will generate several ways for you to integrate the font into your page.
If you only have access to your CSS file (like on WordPress.com where you can’t edit the theme headers), you can use the @import method:
@import url(https://fonts.googleapis.com/css?family=Telex);
If you have full access to your website’s HTML (like a custom site or Blogger), it’s usually better to use the standard link tag inside your <head>:
<link href='http://fonts.googleapis.com/css?family=Telex' rel='stylesheet' type='text/css'>
If you’re building a Javascript-heavy application and need to load fonts dynamically, you can use the WebFont Loader snippet:
<script type="text/javascript">
WebFontConfig = {
  google: { families: [ 'Telex::latin' ] }
};
(function() {
  var wf = document.createElement('script');
  wf.src = ('https:' == document.location.protocol ? 'https' : 'http') +
    '://ajax.googleapis.com/ajax/libs/webfont/1/webfont.js';
  wf.type = 'text/javascript';
  wf.async = 'true';
  var s = document.getElementsByTagName('script')[0];
  s.parentNode.insertBefore(wf, s);
})();
</script>
All three of these methods accomplish the exact same thing: they load the font into the browser. Once the font is loaded, you just apply it via your CSS like this:
font-family: 'Telex', sans-serif;
And just like that, the text element will beautifully render in Telex!
Need More Help?
Check out the official docs for a deeper dive:
Getting Started Guide
WebFont Loader API
No Comments yet!