Implementing Quicksort Algorithm in Java

Quicksort is a divide and conquer algorithm. Quicksort first divides a large array into two smaller sub-arrays: the low elements and the high elements. Quicksort can then recursively sort the sub-arrays.

The steps are:

  1. Pick an element, called a pivot, from the array.
  2. Reorder the array so that all elements with values less than the pivot come before the pivot, while all elements with values greater than the pivot come after it (equal values can go either way). After this partitioning, the pivot is in its final position. This is called the partition operation.
  3. Recursively apply the above steps to the sub-array of elements with smaller values and separately to the sub-array of elements with greater values.

(Via Wikipedia)

Continue reading Implementing Quicksort Algorithm in Java

Implementing Merge Sort Algorithm in Java

A merge sort works as follows:

  • Divide the unsorted list into n sublists, each containing 1 element (a list of 1 element is considered sorted).
  • Repeatedly merge sublists to produce new sorted sublists until there is only 1 sublist remaining. This will be the sorted list.
Merge Sort Example
Merge Sort Example

An example of merge sort. First divide the list into the smallest unit (1 element), then compare each element with the adjacent list to sort and merge the two adjacent lists. Finally all the elements are sorted and merged. (Via Wikipedia)

Continue reading Implementing Merge Sort Algorithm in Java

Implementing MinMax Algorithm in Java

Finding the minimum and maximum elements in a dataset is a common problem in computer science. While you can solve this using simple iteration, using a divide-and-conquer approach is more efficient in certain scenarios, especially in recursive algorithms. In this blog post, we’ll explore a recursive Java implementation of the Min-Max algorithm.

What is the Min-Max Algorithm?

The Min-Max algorithm splits the array into smaller parts, recursively determines the minimum and maximum of each part, and then combines the results. This divide-and-conquer approach reduces the number of comparisons compared to a naive linear method.

Why Use Divide-and-Conquer?

  • It minimizes the number of comparisons.
  • More efficient for large datasets.
  • Demonstrates recursion and good problem-solving strategies.
Continue reading Implementing MinMax Algorithm in Java

Implementing Binary Search in Java

Searching for elements in large datasets is a common task in computer programming, and doing it efficiently can greatly improve performance. One such efficient method is binary search—an algorithm designed specifically for sorted data. In this blog post, we’ll walk through how binary search works conceptually and then explore a working Java program that performs binary search on a user-provided set of numbers.

What is Binary Search?

Binary search is a divide-and-conquer algorithm used to find the position of a target value within a sorted array. Rather than checking each element one by one like a linear search, binary search repeatedly divides the array into two halves and compares the target with the middle element.

How Binary Search Works:

  1. Start with the middle element of the array.
  2. If the middle element is the target, return its index.
  3. If the target is smaller, repeat the search on the left half.
  4. If the target is greater, repeat the search on the right half.
  5. Continue this process until the element is found or the sub-array size becomes zero.

Because it halves the number of elements to be checked each time, binary search has a time complexity of O(log n), making it much faster than linear search for large datasets.

Continue reading Implementing Binary Search in Java

Decompile, Edit, and Recompile Android Apps with APK Studio

If you have ever tried to modify precompiled android application, then you might be familiar with APKTool. APKTool is one of the most commonly used application to decompile and recompile android apk.

But there is a drawback with this APKTool. You can only decompile or recompile your apk, but you cannot edit the content, more specifically the source code. Generally the whole source code is compiled in .smali files and to edit that files you have to rely on some other compiler, decompiler and editor like Notepad++.

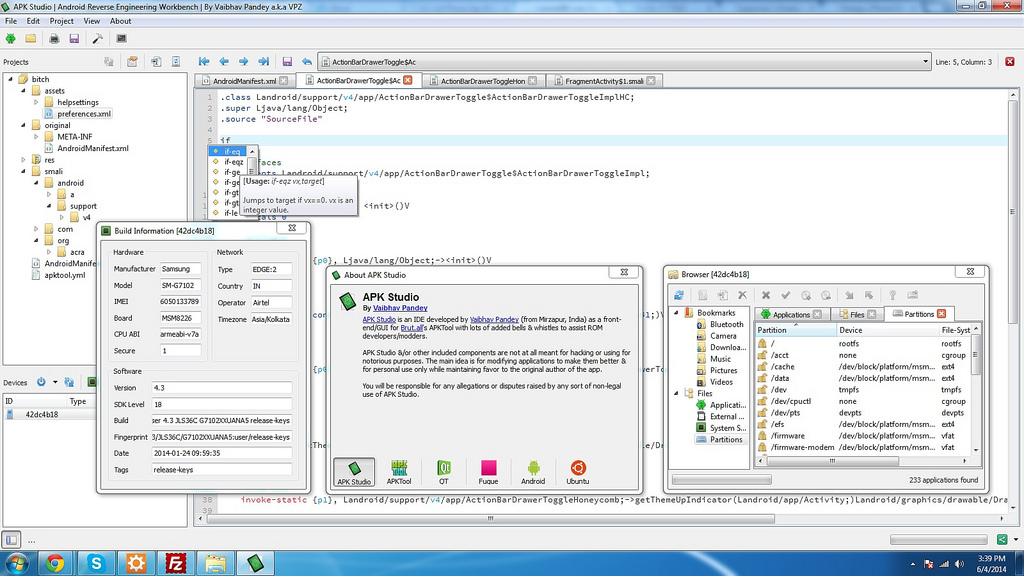
To combine all this things together and to make development easy, an XDA user, Vaibhav, created APK Studio.

APK Studio
APK Studio

As the name suggest, the APK Studio allows you to decompile, edit and recompile apk files right from one single app. This IDE looks quite similar to Netbeans IDE and has a lot of features to explore.

You can download this IDE from codeplex or XDA.

(Image credit: XDA)

Understanding Directory Structure of Symfony 2

Symfony 2 is a PHP framework. When you download it, if noticed, Symfony 2 has a directory structure. By default there are 5 directories like app, bin, src,vendor, web. If you had developed any kind of application with Symfony 2 then you might have followed something like put your source code in src, put all static assets in web, write config files in app etc. Again this directory structure is configurable, that means you can customize it according to your project needs. Even though the directory names are self-explanatory, let’s have a deeper look of this structure.

By default Symfony consists of following directories,

  • app/: The application configuration
  • src/: The project’s PHP code
  • vendor/: The third-party dependencies
  • web/: The web root directory

app/

‘app’ directory in Symfony 2 holds the application configuration. You can find all configuration related stuff in ‘app/config’ folder. If you need to configure your database or Swiftmailer then you will need to change parameters/settings from here. Apart from that this directory holds the ‘cache’. While writing code in Symfony 2 you will be working with lots of files ranging from xml, yml to php, twig, html etc. Controllers will be written in some file, routes will be defined in some another files, views will be written in some other file and so on. So while serving request Symfony has to read all these necessary files. Since the count of files is too high, to achieve great performance Symfony 2 has inbuilt caching. And this cached data will be stored in ‘cache’ directory. Again there is a ‘log’ directory which has debugging related data, especially useful in development.

Continue reading Understanding Directory Structure of Symfony 2