GIT ADD

git add is a Git command used to stage changes made to a working directory, before committing them. Staging is an intermediate step that allows you to control which changes are included in the next commit and which are not.

Here is an example:

Suppose you made changes to two files named file1.txt and file2.txt. You want to include the changes to file1.txt in your next commit, but not the changes to file2.txt.
To do so, first navigate to the project directory in the terminal and execute:

git add file1.txt

This command stages the changes made to the file file1.txt. You can now review the changes staged by executing:

git status

You should see that file1.txt has been staged.
Now you can commit the staged changes by running:

git commit -m "Added new feature to file1.txt"

The commit will include only the changes to file1.txt since file2.txt was not staged.

GIT CLONE

git clone is a command that creates a copy of a repository, including all its branches and history, in a new directory.

Here’s an example:

git clone https://github.com/username/repo.git

This will create a copy of the repository repo owned by username on GitHub, and save it to a new directory called repo in your local machine.

You can also use git clone to clone a repository from a remote server using SSH, or to clone a specific branch.

For more information, you can check out the official Git documentation.

Apache Commons Collection – MultiValuedMap

Apache Commons Collection is a library of useful data structures, collections, and algorithms in Java. MultiValuedMap is one of the data structures present in the Apache Commons Collection. MultiValuedMap is a Map that allows multiple values for a single key. It is a useful implementation of a one-to-many relationship. You can add multiple values to the same key, and the key-value pairs are stored in the order in which they are added.

Here’s an example Java code of using MultiValuedMap:

import org.apache.commons.collections4.MultiValuedMap;
import org.apache.commons.collections4.multimap.ArrayListValuedHashMap;
public class MultiValuedMapDemo {
    public static void main(String[] args) {
        MultiValuedMap<String, String> multiValuedMap = new ArrayListValuedHashMap<>();
        multiValuedMap.put("Key1", "Value1");
        multiValuedMap.put("Key1", "Value2");
        multiValuedMap.put("Key2", "Value3");
        System.out.println(multiValuedMap.get("Key1"));
    }
}

Continue reading Apache Commons Collection – MultiValuedMap

GIT INIT

git init is a command in Git that creates a new Git repository. It sets up all the necessary files and directories that Git needs to begin tracking changes to your project. This command creates a new subdirectory named .git that contains all of the necessary repository files.

Here is an example:

Let’s assume you have a folder on your desktop named “project”. Open a terminal/command prompt in that directory and enter git init. This will create a new subdirectory named .git in your “project” folder.

$ cd ~/Desktop/project
$ git init
Initialized empty Git repository in /Users/USER/Desktop/project/.git/

This command only needs to be run once per repository. After running git init, you can start tracking changes to your project using Git commands like git add and git commit.

Geolocation API

The Geolocation API of web browsers allows websites to request access to the user’s geographical location. The API returns the user’s latitude and longitude coordinates (among other data).

Here is an example code snippet of how to use the Geolocation API:

if ("geolocation" in navigator) {
  // check if geolocation is supported by the browser
  navigator.geolocation.getCurrentPosition(position => {
    // if access is granted, do something with the data
    const latitude = position.coords.latitude;
    const longitude = position.coords.longitude;
    alert(`Your location is (${latitude}, ${longitude})`);
  });
} else {
  alert("Geolocation is not supported by this browser.");
}

Continue reading Geolocation API

Setting up your Angular development environment

Hey there, fellow coders! Ever wanted to build amazing web applications with Angular but felt a bit overwhelmed by the setup process? Don’t worry, you’re not alone! Today, we’re going to walk through setting up your local environment, making it as easy as pie.

What You’ll Need Before We Begin

Before we jump into the nitty-gritty, let’s make sure you’re familiar with a few basics:

  • JavaScript, HTML, and CSS: These are the building blocks of web development. A solid understanding of these will make your Angular journey much smoother.
  • Command Line Interface (CLI): You’ll be using commands in your terminal or command prompt. Don’t worry, we’ll guide you through them.
  • TypeScript (Optional): Angular is built with TypeScript, which adds static typing to JavaScript. While it’s helpful, you can start without deep knowledge.

Let’s Get Started: Dependencies and Installation

1. Node.js and npm:

Angular CLI relies on Node.js and npm (Node Package Manager).

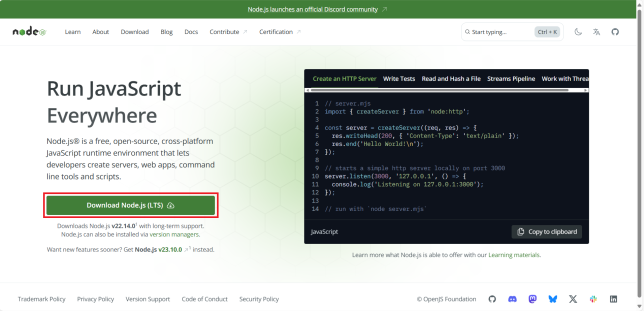
Head over to the official Node.js (https://nodejs.org/en) website and download the latest LTS (Long Term Support) version by clicking Download Node.js button.

Once it is downloaded, double click on the downloaded file to start its installation. Installing Node.js will automatically install npm.

As stated in the angular documentation, it is important to use an active or maintenance LTS version of node.js. Please refer to the angular version compatibility guide for more details.

Continue reading Setting up your Angular development environment

Spring Cloud: Getting started with Hystrix Dashboard

This is a quick tutorial on Hystrix dashboard. Hystrix dashboard allows you to view the overall status of your Spring cloud application at a single glance. It provides access to vital metrics of your application and gives you a graphical representation of those for better understanding.

This post is the continuation of Spring Cloud: Adding Hystrix Circuit Breaker and Spring Cloud: Playing with Hystrix Circuit Breaker. Please go through those post, if you haven’t. Those posts explain about Hystrix circuit breaker.

TL;DR You can download whole project by clicking following link.

Continue reading Spring Cloud: Getting started with Hystrix Dashboard