
Today, I’m going to show you how to connect to and interact with Oracle SQL directly from your Windows command prompt. You might be wondering why we don’t just use the built-in Run SQL Command Line tool from the Start menu. The big issue with that tool is that it doesn’t support basic copy and paste functionality—something that developers like you and me desperately need! So, let’s look at how to properly connect to your database using the trusty standard command prompt.
First things first, you’ll need to have Oracle SQL installed on your PC. If you don’t have it yet, you can grab it right here:
Download Oracle SQL Express Edition 11g
Oracle SQL Express is completely free to use, but Oracle does require you to log in before downloading. If you don’t have an account, just hit the sign-up button—it’s free and only takes a minute.
The download is fairly hefty at around 350MB. Once it’s finished, extract the ZIP file and run setup.exe. The installation wizard is pretty standard. If you’ve installed Windows software before, you can safely just click “Next” through most of the prompts.
During the setup process, you’ll eventually hit a screen that looks like this:
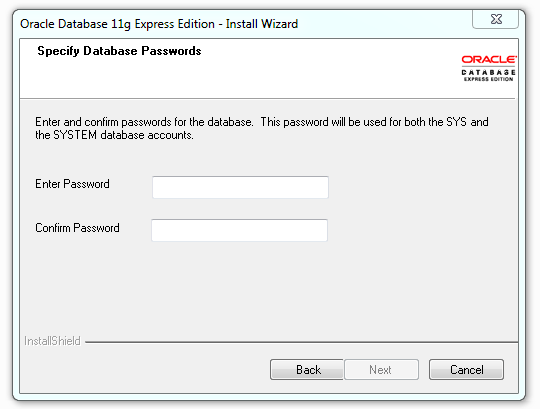
This is an important step. You’re being asked to set the password for the SYS and SYSTEM users. In Oracle, these are your master administrative accounts. If you’re just setting this up on your local machine for development and learning, I highly recommend using a simple password like admin. It’s easy to remember and quick to type. Of course, you can use whatever password you prefer. Once you’ve typed it in, click Next.
The installer will now begin copying files and setting up your database. Just sit back and wait for it to finish.
Once the installation wraps up, open up your standard Windows Command Prompt (you can search for cmd in the Start menu).
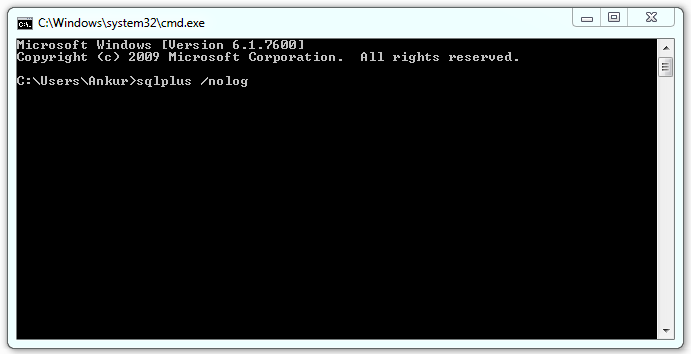
To fire up the SQL interface, type the following command and hit enter:
sqlplus /nolog
This launches the SQL environment right inside your command prompt.
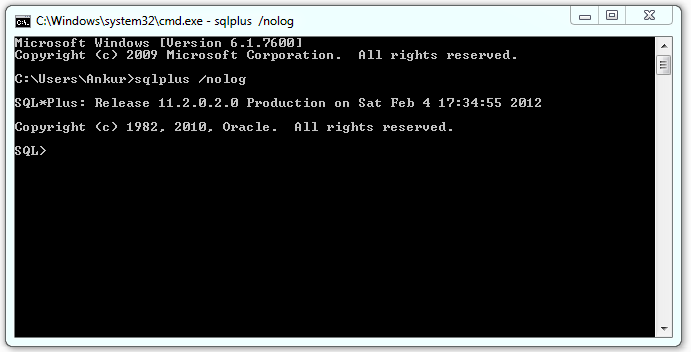
You’ll notice your prompt has changed from a standard file path to SQL>. This means you’re successfully inside the SQL Plus interface!
Now, you actually need to connect to your database instance. The connection syntax is very straightforward:
connect [username]/[password]@[server]
In our case, the username is SYSTEM. The password is whatever you configured during setup (I used admin). And since the database is running locally on your own machine, the server address is just localhost (or 127.0.0.1).
So, stringing it all together, you’ll type this (make sure you don’t put a semicolon at the end!):
connect SYSTEM/admin@localhost
(Remember to swap out admin if you used a different password).
If everything is configured correctly, you’ll see a friendly Connected message appear on your screen. You’re now fully hooked into Oracle SQL!
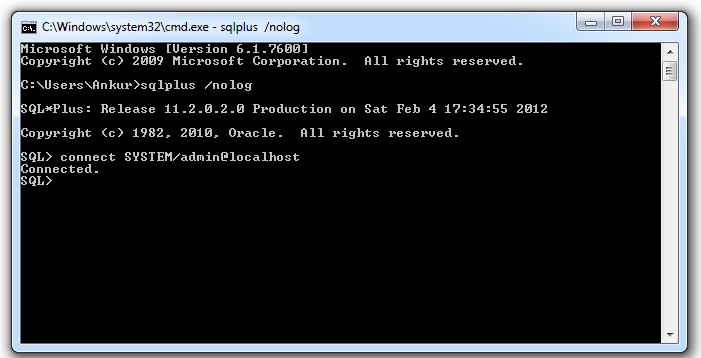
Whenever you want to work with your database in the future, you’ll just need to repeat these two simple steps: run sqlplus /nolog and then fire your connect query.
That’s it! You’re ready to start writing queries.
If you run into any errors or need some help getting this running, feel free to drop a comment below and I’ll do my best to help you out.
No Comments yet!