
This is a quick tutorial for creating a REST API client using Spring Cloud Ribbon component. For this tutorial, you will need a running Eureka server and a Eureka client application. In case if you do not have Eureka server or a Eureka client application, check out my previous posts which explain how to setup eureka server and how to develop a eureka client application.
What is Ribbon?
In short, Ribbon is a load balancer. Let’s say you have a service which is used by 1000’s of customers. In that case, you may have multiple instances of service running on multiple servers for load balancing purpose. Now if you want to consume that service in another service, you should not hard code its URL. Because that will always point to only one service and will defeat the purpose of load balancing.
Ribbon helps us to solve this issue. Ribbon on backend talks with Eureka server and will get all instances of services and try to distribute the load across instances.
TL;DR You can download whole project by clicking following link.
To give you a brief idea about the project… We will have a producer which we will be launching multiple times. We will be creating a consumer with Ribbon which will consume the service exposed by the producer. At the same time, it will take care of load balancing as well.
Producer Service
In case if you have a producer service ready then it is well and good. Else you can download sample producer service by clicking on the following link or you can refer how to develop a eureka client application post.
Consumer Service with Ribbon
Let’s create a consumer service with Ribbon component. Let’s start playing with Ribbon.
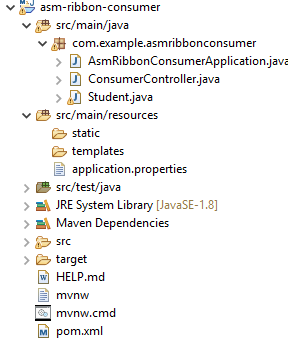
This will be a Maven Project. Our project structure is given below. We will be creating four files which are as follows:
- AsmRibbonConsumerApplication.java – Spring boot run–able file
- ConsumerController.java – Rest controller
- Student.java – Our POJO/model
- application.properties – Spring properties file
Adding Dependencies
Let’s add the required dependencies. Replace content in pom.xml file with the following content. Don’t forget to update the project using Maven > Update option. That will download all the necessary dependencies.
<?xml version="1.0" encoding="UTF-8"?>
<project xmlns="http://maven.apache.org/POM/4.0.0"
	xmlns:xsi="http://www.w3.org/2001/XMLSchema-instance"
	xsi:schemaLocation="http://maven.apache.org/POM/4.0.0 https://maven.apache.org/xsd/maven-4.0.0.xsd">
	<modelVersion>4.0.0</modelVersion>
	<parent>
		<groupId>org.springframework.boot</groupId>
		<artifactId>spring-boot-starter-parent</artifactId>
		<version>2.3.1.RELEASE</version>
		<relativePath /> <!-- lookup parent from repository -->
	</parent>
	<groupId>com.example</groupId>
	<artifactId>asm-ribbon-consumer</artifactId>
	<version>0.0.1-SNAPSHOT</version>
	<name>asm-ribbon-consumer</name>
	<description>asmribbonconsumer</description>

	<properties>
		<java.version>1.8</java.version>
		<spring-cloud.version>Hoxton.SR6</spring-cloud.version>
		<maven-jar-plugin.version>3.1.1</maven-jar-plugin.version>
	</properties>

	<dependencies>

		<dependency>
			<groupId>org.springframework.cloud</groupId>
			<artifactId>spring-cloud-starter-netflix-eureka-client</artifactId>
		</dependency>

		<dependency>
			<groupId>org.springframework.boot</groupId>
			<artifactId>spring-boot-starter-web</artifactId>
		</dependency>

		<dependency>
			<groupId>org.springframework.cloud</groupId>
			<artifactId>spring-cloud-starter-netflix-ribbon</artifactId>
		</dependency>

		<dependency>
			<groupId>org.springframework.boot</groupId>
			<artifactId>spring-boot-starter-test</artifactId>
			<scope>test</scope>
			<exclusions>
				<exclusion>
					<groupId>org.junit.vintage</groupId>
					<artifactId>junit-vintage-engine</artifactId>
				</exclusion>
			</exclusions>
		</dependency>
	</dependencies>

	<dependencyManagement>
		<dependencies>
			<dependency>
				<groupId>org.springframework.cloud</groupId>
				<artifactId>spring-cloud-dependencies</artifactId>
				<version>${spring-cloud.version}</version>
				<type>pom</type>
				<scope>import</scope>
			</dependency>
		</dependencies>
	</dependencyManagement>

	<build>
		<plugins>
			<plugin>
				<groupId>org.springframework.boot</groupId>
				<artifactId>spring-boot-maven-plugin</artifactId>
			</plugin>
		</plugins>
	</build>

</project>
If you have noticed, we have added ‘spring-cloud-starter-netflix-ribbon‘. That is the required dependency.
Creating Spring Boot Application
Create file AsmRibbonConsumerApplication.java and add the following content. This file will serve as the entry point for our application.
package com.example.asmribbonconsumer;

import org.springframework.boot.SpringApplication;
import org.springframework.boot.autoconfigure.SpringBootApplication;

@SpringBootApplication
public class AsmRibbonConsumerApplication {

	public static void main(String[] args) {
		SpringApplication.run(AsmRibbonConsumerApplication.class, args);
	}

}
Creating model
Create class Student.java. This will be our POJO/model class. It has only 3 attributes viz, id, name and enrolled course.
package com.example.asmproducer;

import java.io.Serializable;

public class Student implements Serializable {

	private int id;

	private String name;

	private String enrolledCourse;

	public Student() {
		super();
	}

	public Student(int id, String name, String enrolledCourse) {
		super();
		this.id = id;
		this.name = name;
		this.enrolledCourse = enrolledCourse;
	}

	public int getId() {
		return id;
	}

	public void setId(int id) {
		this.id = id;
	}

	public String getName() {
		return name;
	}

	public void setName(String name) {
		this.name = name;
	}

	public String getEnrolledCourse() {
		return enrolledCourse;
	}

	public void setEnrolledCourse(String enrolledCourse) {
		this.enrolledCourse = enrolledCourse;
	}

}
Creating Controller
Create class ConsumerController.java and add the following content. This will be our rest controller and will have endpoint related stuff.
package com.example.asmribbonconsumer;

import org.springframework.beans.factory.annotation.Autowired;
import org.springframework.cloud.client.ServiceInstance;
import org.springframework.cloud.client.loadbalancer.LoadBalancerClient;
import org.springframework.http.ResponseEntity;
import org.springframework.web.bind.annotation.GetMapping;
import org.springframework.web.bind.annotation.PathVariable;
import org.springframework.web.bind.annotation.RestController;
import org.springframework.web.client.RestTemplate;

@RestController
public class ConsumerController {

	@Autowired
	private LoadBalancerClient loadBalancer;

	@GetMapping("/studentdetails/{studentId}")
	public Student letsSayHello(@PathVariable int studentId) {
		ServiceInstance serviceInstance = loadBalancer.choose("StudentProducer");
		System.out.println(serviceInstance.getUri());

		String baseUrl = serviceInstance.getUri().toString();
		baseUrl = baseUrl + "/student";

		RestTemplate restTemplate = new RestTemplate();
		ResponseEntity<Student> response = restTemplate.getForEntity(baseUrl + "/" + studentId, Student.class);

		return response.getBody();
	}

}
Here if you have noticed, rather than using DiscoveryClient now we are using LoadBalancerClient. This class is provided by Ribbon and will take care of load balancing. LoadBalancerClient’s choose(String) function picks an instance of the given service on each invocation — round-robin across instances by default — and will lead to load balancing.
Under resources folder create a file with name application.properties and add the following content.
spring.application.name=StudentConsumer1
eureka.client.serviceUrl.defaultZone=http://localhost:11800/eureka
server.port=11802
In this file, we have specified 3 properties viz. our application name, Eureka server’s URL and server port for our instance.
Now you can run AsmConsumerApplication.java and your producer application as well. If possible then try to launch multiple instances of producer application.
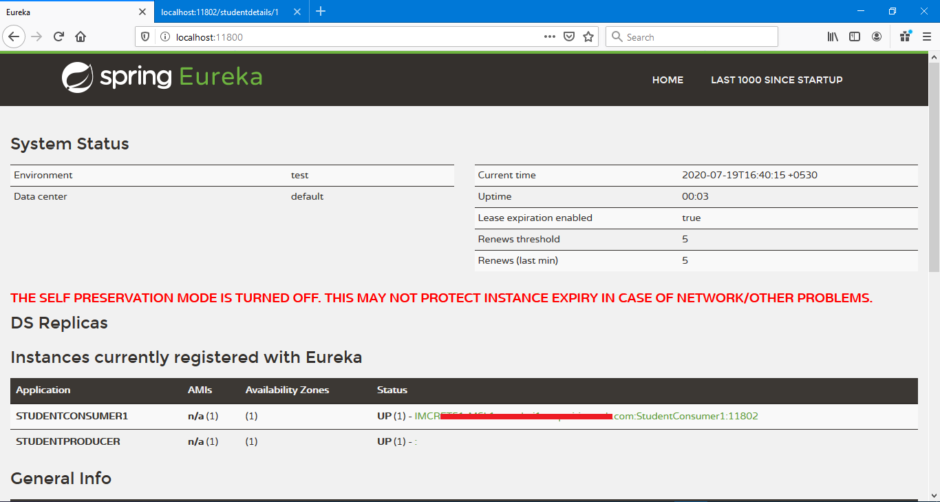
Once everything is running refresh your eureka dashboard and you should able to see applications under ‘Instances currently registered with Eureka’ section.
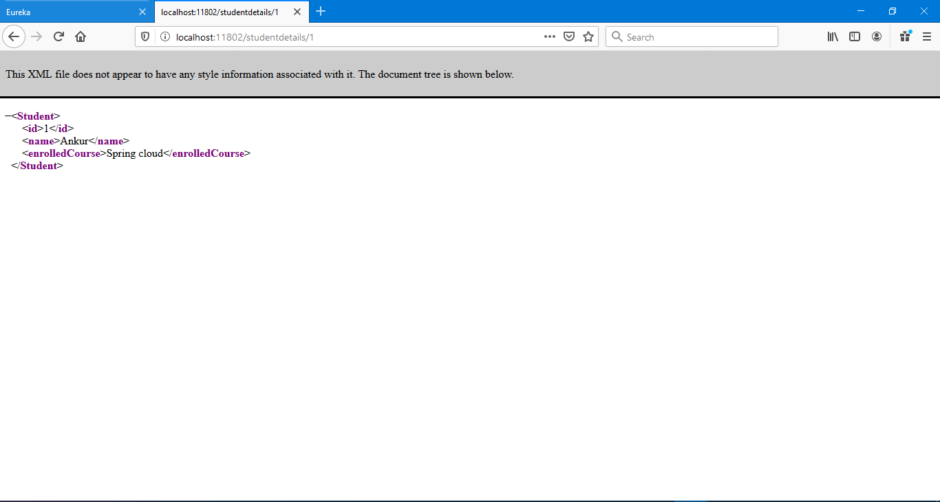
Let’s see if we can invoke our service or not. For that, you will need to navigate to ‘http://localhost:11802/studentdetails/1’ url. You should see some result as shown in below screenshot.
If you navigate to the console of our consumer/ribbon application, you should see the URL of actual service which our load balancer has selected.

Downloads:
References:
- Spring Cloud- Netflix Eureka + Ribbon Simple Example by JavaInUse.
- Spring Cloud Rest Client using Netflix Ribbon by Baeldung.
- Spring cloud ribbon with eureka – Client side load balancer example by HowToDoInJava.