
This is a quick tutorial on Spring Cloud Config Server. In brief, Spring cloud config allows you to have applications/micro-services configuration at a centralized place. Since we are working on spring micro-services, in production we may have hundreds of micro-services running together. Now if we want to manage configuration for hundreds of those micro-services then it would be a big pain if we do it manually. Instead, we will use Spring cloud config server to manage that configuration from a central place.
TL;DR You can download whole project by clicking following link.
Creating Config Server
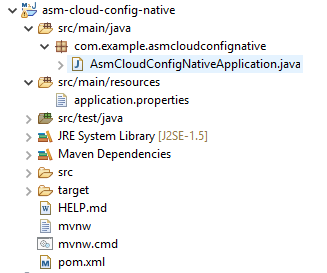
Let’s set up our config server. For that, we will be creating a Maven Project. Our project structure is given below. We will be creating two files which are as follows:
- AsmCloudConfigNativeApplication.java – Spring boot run–able file
- application.properties – Spring properties file
Adding Dependencies
Let’s add the required dependencies. Replace content in pom.xml file with the following content. Don’t forget to update the project using Maven > Update option. That will download all the necessary dependencies.
Note that we will require ‘spring-cloud-config-server‘ dependency for our server.
<?xml version="1.0" encoding="UTF-8"?>
<project xmlns="http://maven.apache.org/POM/4.0.0" xmlns:xsi="http://www.w3.org/2001/XMLSchema-instance"
	xsi:schemaLocation="http://maven.apache.org/POM/4.0.0 https://maven.apache.org/xsd/maven-4.0.0.xsd">
	<modelVersion>4.0.0</modelVersion>
	<parent>
		<groupId>org.springframework.boot</groupId>
		<artifactId>spring-boot-starter-parent</artifactId>
		<version>2.3.2.RELEASE</version>
		<relativePath/> <!-- lookup parent from repository -->
	</parent>
	<groupId>com.example</groupId>
	<artifactId>asm-cloud-config-native</artifactId>
	<version>0.0.1-SNAPSHOT</version>
	<name>asm-cloud-config-native</name>
	<description>Demo project for Spring Boot</description>
	<properties>
		<java.version>11</java.version>
		<spring-cloud.version>Hoxton.SR6</spring-cloud.version>
		<maven-jar-plugin.version>3.1.1</maven-jar-plugin.version>
	</properties>
	<dependencies>
		<dependency>
			<groupId>org.springframework.cloud</groupId>
			<artifactId>spring-cloud-config-server</artifactId>
		</dependency>
		<dependency>
			<groupId>org.springframework.boot</groupId>
			<artifactId>spring-boot-starter-test</artifactId>
			<scope>test</scope>
			<exclusions>
				<exclusion>
					<groupId>org.junit.vintage</groupId>
					<artifactId>junit-vintage-engine</artifactId>
				</exclusion>
			</exclusions>
		</dependency>
	</dependencies>
	<dependencyManagement>
		<dependencies>
			<dependency>
				<groupId>org.springframework.cloud</groupId>
				<artifactId>spring-cloud-dependencies</artifactId>
				<version>${spring-cloud.version}</version>
				<type>pom</type>
				<scope>import</scope>
			</dependency>
		</dependencies>
	</dependencyManagement>
	<build>
		<plugins>
			<plugin>
				<groupId>org.springframework.boot</groupId>
				<artifactId>spring-boot-maven-plugin</artifactId>
			</plugin>
		</plugins>
	</build>
</project>
Creating Spring Boot Application
Create file AsmCloudConfigNativeApplication.java and add the following content. This file will serve as the entry point for our application. We will be adding @EnableConfigServer annotation on this class. This will enable the config server.
package com.example.asmcloudconfignative;
import org.springframework.boot.SpringApplication;
import org.springframework.boot.autoconfigure.SpringBootApplication;
import org.springframework.cloud.config.server.EnableConfigServer;

@SpringBootApplication
@EnableConfigServer
public class AsmCloudConfigNativeApplication {

	public static void main(String[] args) {
		SpringApplication.run(AsmCloudConfigNativeApplication.class, args);
	}
}
Adding Properties
Under resources folder create a file with name application.properties and add the following content.
spring.profiles.active=native
server.port=8888
spring.cloud.config.server.native.search-locations=file:///C:/commonconfig
For this tutorial, we are using spring cloud config native configuration method and we have configuration stored in a file on our file system. We have mentioned its path in our properties files.
- spring.profiles.active=native — the Config Server supports several backends (Git, Vault, JDBC, filesystem). Activating the native profile tells it to serve configuration straight from a local directory instead of a Git repository — convenient for development, but you lose version history.
- server.port=8888 — 8888 is the conventional Config Server port; client applications look for
http://localhost:8888by default, so using it means less configuration on every client. - search-locations=file:///C:/commonconfig — the directory the server reads property files from. The file name decides who gets what:
application.propertiesis served to every client, whileStudentProducer.propertieswould be served only to the app whosespring.application.nameis StudentProducer.
Note:
If you have noticed then in this tutorial we have stored our configuration properties at a particular location on our file system. In case if you want to store those configuration properties on your classpath and ship with your application you can use the following line.
spring.cloud.config.server.native.search-locations=classpath:/configThis way the configuration properties will be loaded from the config folder present on the classpath.
Common Configuration
Now navigate to your ‘C’ drive and create a folder with name ‘commonconfig’. In this folder, we will be storing our common application config file. This is the path which we have mentioned in our application.properties file.
Now create a file with name application.properties in that folder. Please add below-given configuration in that file. It contains the URL of your Eureka server because it is common to our producer and consumer application.
eureka.client.serviceUrl.defaultZone=http://localhost:11800/eureka
eureka.instance.instanceId=:
We have done setting up Spring cloud config server. Now we will integrate it with our consumer and producer application. For that, we will need to include one more dependency in pom.xml and will need to do some changes in our application.properties files of both projects.
Updating Consumer Project
For consumer project we will be using application created in Spring Cloud: Creating REST Client Using Ribbon tutorial. As discussed earlier, we will be modifying that project to meet our requirements.
First, we will need to add ‘spring-cloud-starter-config‘ dependency in pom.xml. That dependency will add necessary components which will allow us to consume configurations from the config server.
		<dependency>
			<groupId>org.springframework.cloud</groupId>
			<artifactId>spring-cloud-starter-config</artifactId>
		</dependency>
Now from application.properties file, we will remove Eureka Server URL and instance-id configuration. We have moved it to our common configuration.
spring.application.name=StudentConsumer1
server.port=11802
You can download the modified consumer project by clicking on the following link.
Updating Producer Project
For producer project, we will be using application created in Spring Cloud: Creating Student Service With Eureka. Now we will do similar changes in our producer application as well.
First we will add ‘spring-cloud-starter-config‘ dependency in pom.xml.
		<dependency>
			<groupId>org.springframework.cloud</groupId>
			<artifactId>spring-cloud-starter-config</artifactId>
		</dependency>
Then we will remove common configurations from application.properties.
spring.application.name=StudentProducer
server.port=0
You can download the modified producer project by clicking on the following link.
Eureka Server
Of-course we will need Eureka server as well. For that you can refer Setting Up Eureka Server Using Spring Cloud post which has detailed step by step explanation or you can download the following project and run it directly.
Testing it…
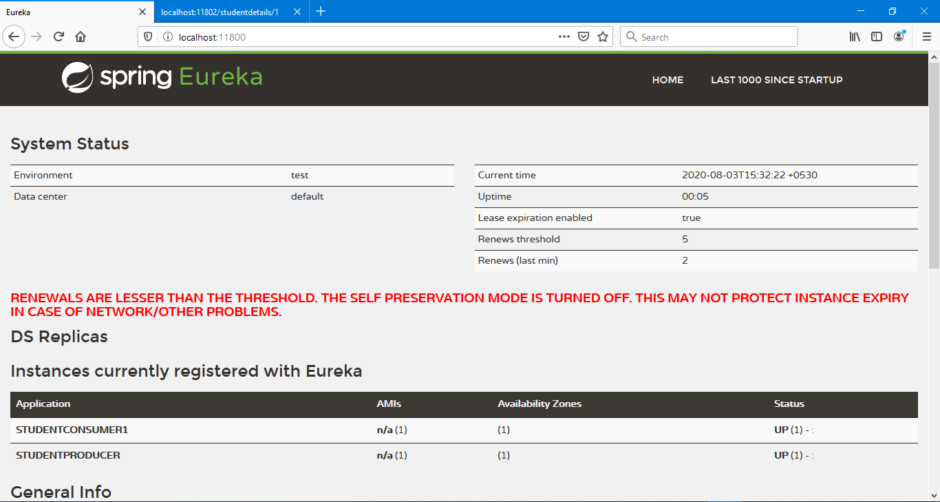
Now let’s start all of our applications. We will start with Eureka server first. Once Eureka server is up we will start Spring cloud config server. Then we will start producer and consumer application respectively. Once all applications are up, you can navigate to Eureka dashboard and check the status of running services.
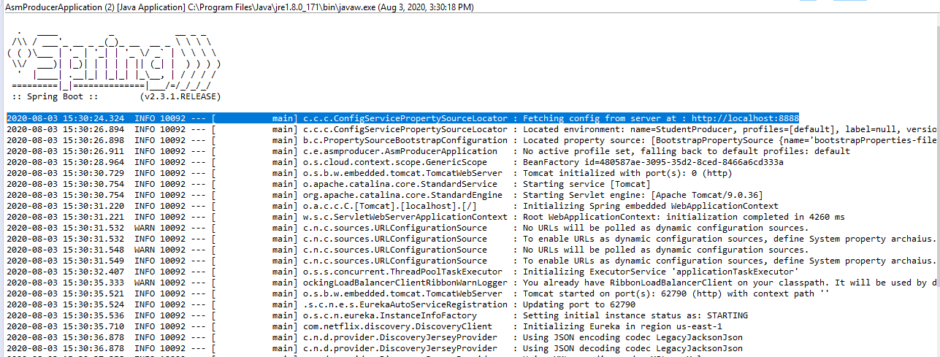
If you check logs of our producer or consumer application, you should see a line similar to which highlighted below. This line states that our application has contacted spring cloud config server for retrieving configuration.
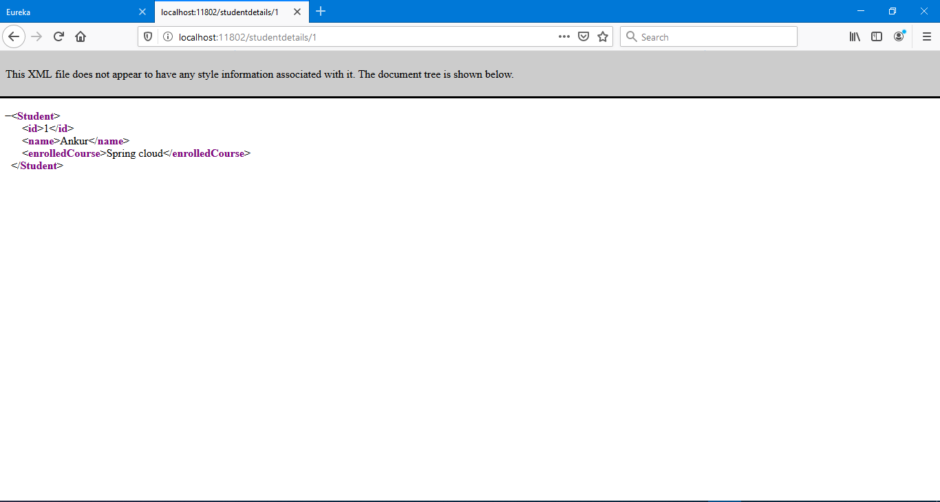
Let’s navigate to one of our endpoints and let’s check if we can able to access our service or not. If you navigate to ‘http://localhost:11802/studentdetails/1’ endpoint you should see output something similar to shown below. If you are getting this output that means that we have configured our spring application correctly.
Downloads:
References:
- Spring Cloud Config Server Simple Example by JavaInUse