Creating Your Own Themes For Google Chrome

Note: I wrote this in 2013, before Chrome locked extension installs down to the Web Store only. The direct .crx download/sideload approach described below — including my own custom theme file — won’t install on Chrome today. Keeping this post up as a historical snapshot.

Of-course for most of you Google Chrome is just like a friend on internet. As you know, you can customize Google Chrome by adding several addons and themes from Chrome Web Store or form internet. Ya! those addons and themes are not customizable. Somebody has built it and you are consuming it. It may happen that, you may fall in love with a theme, but sometimes since it is your bad luck, when you download that theme, you find that it not having proper resolution! So here is one best option for you, Create your own theme.

Each one thinks in different way. Hence choices are different. Accounting such requirements of Google Chrome users, Google have developed an extension to create your own themes. You can navigate to Chrome Web Store and look for “My Chrome Theme” or else you can simply click here. You might need to sign in to Chrome Web Store to add this extension to your browser.

Getting Started
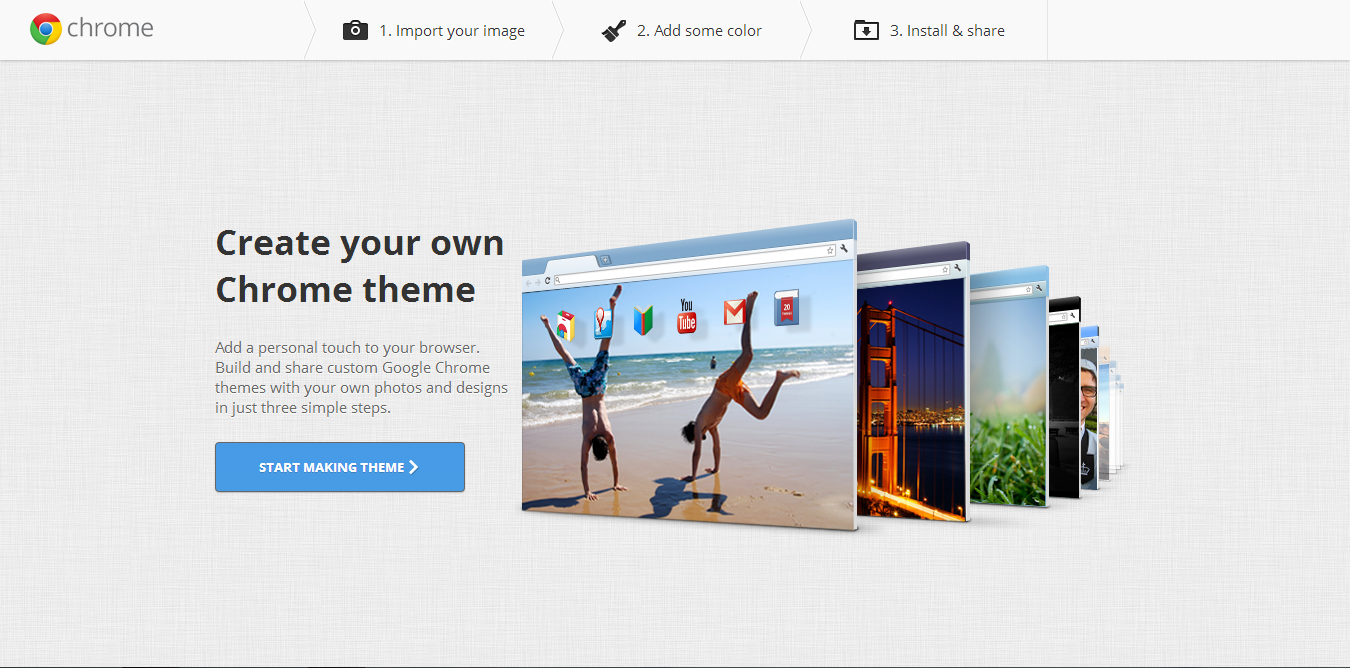
Create Your Own Theme:Chrome
Create Your Own Theme:Chrome (Introduction)

Creating themes with My Chrome Theme is quite easy. You just have to launch the app & click on “Start Making New Theme”.

Continue reading Creating Your Own Themes For Google Chrome

Git – Autocorrect Spelling

Git has a built-in typo handler that most people never turn on: help.autocorrect. By default Git just suggests the command it thinks you meant, but you can configure it to run the correction automatically, with or without a delay. This is the thirteenth and last post in this site’s Git command guide — a smaller, more personal config topic to close out with, following Git: Delete Last Commit.

Continue reading Git – Autocorrect Spelling

How To Integrate Dropbox In Microsoft Office 2013

Note: This post describes a batch-file Dropbox integration for Office 2013 that no longer works. In Microsoft 365, you can add Dropbox natively: open any Office app, go to File > Save As > Add a Place and select Dropbox, or save files directly to your Dropbox sync folder. The batch file linked below is outdated and should not be used.

Microsoft office 2013 comes with a lots of new features and a cool new look. Aside from that, the office 2013 comes integrated with the cloud storage services. With the default installation, only Skydrive is accessible form Microsoft office 2013. With help of this integration you can directly store your files on cloud storage and can access them from anywhere.

But what if Skydrive is not your primary storage?? No worries. Here is how you can integrate Dropbox cloud storage service in your Office 2013 installation.

Integrating Dropbox

If your primary cloud storage is Dropbox then proceed ahead. If not, then you can sign up for Dropbox by clicking here. Dropbox comes with 2 GB of free storage which can be increased by referring friends or can be purchased from Dropbox.com. The features provided by Dropbox are somewhat similar to all other cloud storage services. One best thing I liked about Dropbox is it’s delta sync feature. This feature allows us to update a small part of huge file without actually uploading the whole file. Anyways here are the steps to integrate Dropbox in Microsoft office 2013.

Step 1: Get Dropbox

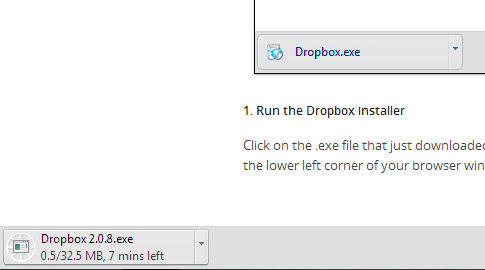
Downloading Dropbox
Downloading Dropbox

Initially you have to download and install Dropbox client on your PC. Of course since many of you already a Dropbox users, you will have it on your PC. If not then you can download the  setup from Dropbox.com or by clicking here.

Continue reading How To Integrate Dropbox In Microsoft Office 2013

Customizing Ribbons in Office 2013

Note: This post covers ribbon customization in Office 2013. The core steps — right-click the ribbon, select Customize the Ribbon, and add commands to groups — still work in Microsoft 365. Screenshots here reflect the Office 2013 UI and may look slightly different in newer versions.

With release of Microsoft Office 2007, Microsoft has introduced a new feature called as Ribbon. Ribbon is nothing but the replacement of old age office toolbars. Ribbon provide a lot of tools for editing your document, presentations and spreadsheets. Since ribbon has replaced toolbars and menus, many people do found it confusing. People who are familiar with older versions of office are too confused while searching for a tool in ribbon. So here are steps to customize ribbon in Office 2013 so you can group your tools according to your own requirements.

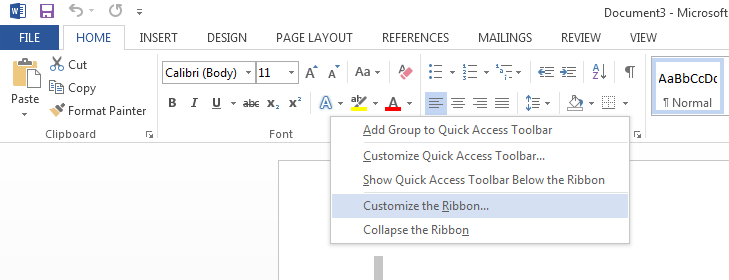
Step 1: Enter in Customize the Ribbon menu

This is the place from where you can customize your ribbon. To enter, you have to right click on ribbon and then you have to select Customize the Ribbon from options.

Customize the Ribbon

Continue reading Customizing Ribbons in Office 2013

Make Gmail To Load Faster: Part 2

Note: I wrote this in 2013, back when Gmail still had a separate “Basic HTML” mode, a Labs program, and the nocheckbrowser parameter described below. None of those exist on today’s unified Gmail. Keeping this post up as a historical snapshot — see Part 1 for the rest of the series.

This post is part of series ‘Make Gmail to Load Faster’. You can read Part 1 of this series by clicking here.

1. Use https://

Gmail works on https always to provide security to your data while transferring it between Gmail servers and your machine. So even though you are on http, Gmail will take you on https automatically. But this switching process (from http to https) requires redirect. Which further need nearly 2-3 seconds of time. So if you want to gain those 2-3 second then directly type https://gmail.com or bookmark the login page for feature use.
Continue reading Make Gmail To Load Faster: Part 2

Make Gmail To Load Faster: Part 1

Note: I wrote this in 2013. Web Clips, the classic-vs-Priority-Inbox toggle, and Gmail Labs — all referenced below — were retired by Google years ago, and the Settings menu has been redesigned since. Keeping this post up for the record.

Gmail, an email service from Google and you are using it from a long time. Gmail is one of the most widely used and popular email service. It provides you simple yet powerful interface and functionality to deal with your day to day email communication. Modern Gmail comes with an eye candy interface and with great features. Of course, Gmail works smoothly on most of modern browsers like Google Chrome, Mozilla Firefox. But still on other hand, on slow internet connection then Gmail takes a huge time to load. Sometime even on fast internet connections, Gmail keeps on showing “Still Working” for a long time. So here are some tricks to make your Gmail faster and quicker.

1. Reduce maximum page size

Gmail by default loads 50 email threads as soon as you log in into your account. So Gmail servers may take some amount of time to collect information about all those 50 emails. If you have enabled priority inbox then Gmail may take more amount of time. If you reduce this number, say to 25 i.e. half of default, then Gmail will take less amount of time to load.

Gmail Page Size

You can change maximum page size from Settings then General and then Maximum page size.
Continue reading Make Gmail To Load Faster: Part 1