Search Switch: Search Major Websites Directly From Google’s Home Page

Note: I wrote this in 2013 about a browser extension that added a site-switcher button to Google’s homepage. The extension is long gone from the Chrome Web Store and Google’s homepage has changed since, so this isn’t actionable today. Keeping this post up for the record.

In your life, Google might be one of your best friend on internet. Whenever you need any information, Google is always there for you. You just navigate to www.google.com, enters a query and Google displays you a huge list of result. This list contains results for all websites, you can say nearly all those which are present on internet. But sometimes it may happen that you might want a result from some specific website, say a video from YouTube or you can say an article from Wikipedia. How to do that? Ya! There are few search operators but let’s take help of a great extension Search Switch.

Search Switch is available for both Chrome and Firefox (You can find download link at end of this post). Just you have to navigate to site, and Download. Once Search Switch is installed on your favorite browser, you have to navigate to www.google.com and you will find a refresh (somewhat like that) button at right side of Google Search box. Just click on that button and select the site on which you want to search. The default Google logo will get replaced and ‘Google Search” button will change as soon as you select the site from list. Now, just enter your query and hit Search button. That’s all. Search Switch will take you on respective site and will show result for your query.
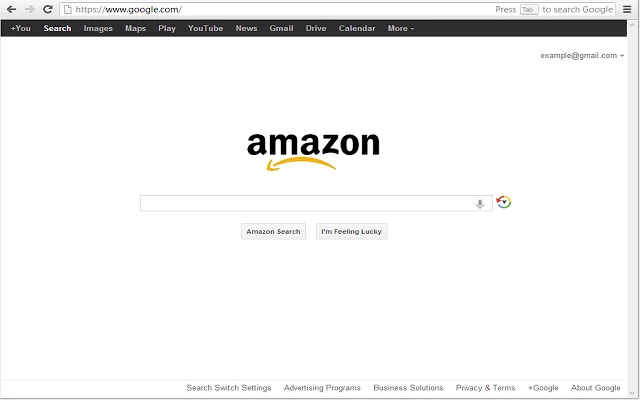
Search Switch in action

You can use up/down arrow keys or mouse scroll to switch between sites. Apart from that, Search Switch provides few shortcut keys to switch between the websites. You can get complete list of keys in setting menu of Search Switch (which is located on footer of google.com whenever Search Switch is enable) or at their website. Search Switch supports Amazon, eBay, Wikipedia, Twitter, YouTube, Pinterest, Facebook, Weather.com, WebMD, IMDb, your Gmail Inbox, eHow, Yelp, and RetailMeNot. Here is a small video on how Search Switch works.

If you are a Google Chrome user, then you can get Search Switch from Chrome Web Store. But if you are a Mozilla Firefox user then you have to download it from official website of Search Switch. When we tested Search Switch, we found that Search Switch works only with www.google.com and not with region specific versions of Google.


Download Search Switch (Chrome Store)

Hide the Admin Bar in WordPress

As you know whenever an user login to WordPress system, who-ever it may be admin or just a subscriber, WordPress automatically shows an admin bar at top of the screen. If the user is administrator then this admin bar provides some useful functionality such as links to navigate to various admin panels of websites, moderating comments, shows available updates etc. The options may be vary depending upon the plugins you have installed.

You might know that this admin bar can be hidden form Profile > Toolbar > Uncheck “Show Toolbar when viewing site”. This is something depends on user’s will. If they like that admin bar they will not hide it. But it may happen that, you want to hide admin bar for all users maybe due to it interferes with your design. Both methods below are still valid in current WordPress: the show_admin_bar filter hides the bar sitewide for every user, while the show_admin_bar_front user meta lets you hide it for a specific user only.

Option 1: Hide for all users (sitewide)

Add this to your theme’s functions.php or a site-specific plugin:
add_filter( 'show_admin_bar', '__return_false' );

Option 2: Hide for the current user only

Call this once (e.g. on a settings save or a one-time migration) to set the preference for the currently logged-in user:
// Hide admin bar for the current user only
update_user_meta( get_current_user_id(), 'show_admin_bar_front', false );
Now the admin bar will be hidden from all users (Option 1) or just the chosen user (Option 2). That’s all. Thank you WordPress hooks!

How To Read Facebook Chat Messages And Stay Undetected

Caution: The extension described in this post was hosted on the Crossrider platform, which shut down in 2018. The install link below is dead. Any site currently distributing an extension named “Chat Undetected” is not the original and may be unsafe — do not install it. The Facebook Chat sidebar this post targeted was also discontinued; chat now lives in Messenger. This post is kept for historical reference only.

Are you getting annoyed by Facebook chat messages? In past days, if somebody is constantly bombarding you with annoying chat messages then there was a solution to avoid those conversations. Just don’t reply to those messages and then after sometime reply like you have not seen any of those messages. But now Facebook updated their chat feature. They have implemented Read Receipt feature on Facebook Chat. Now-a-days when somebody sends you a chat message, he or she will get a receipt that you have read his/her message or not. Hence old excuses will not work now. Now as sender knows, you have read his/her message or not, you cannot neglect them. Hence there is no option other than replying those annoying chat messages or turn off Facebook chat whenever such things happens. According to me, second option is not quite useful at many times.

Facebook Read Receipt
Facebook Read Receipt Screenshot

Facebook do offers a lot of privacy settings, but they do not offer any setting to turn off read receipt feature of Facebook chat. Hence to get such functionality you have to relay on some third party apps to turn it off. Luckily there is a browser extension for Google Chrome and Mozilla Firefox. This extension will allow you to read all those messages and also allows you to stay undetected. Just navigate to this site and simply click on that big green “Get Chat Undetected” button.

If you are using Google Chrome then a installation file will be downloaded to your PC. Once download is completed, you just have to close Google Chrome if it is running and then run that installation file and Chat Undetected will get installed on your Google Chrome. If you are using Mozilla Firefox then you will receive an add-on notice on your screen as soon as you click on that button, confirming the installation of Chat Undetected. Click on “Install Now” and Chat Undetected will get installed your Mozilla Firefox in few seconds.

Once you installed add-on on Mozilla Firefox or Google Chrome, the add-on will block your browser from sending those “Seen” receipts to Facebook. That simply means, now onward the sender will not get acknowledgements that you have read his or her messages. So now, if he/she starts fight with you on topic “You are not replying me on Facebook chat” then you can simply ask “Did you received acknowledgement?”. As acknowledgement is not sent to your friend, Of-course he/she will say “No” and then you can simply behave like you don’t know anything. That’s simple. Now you can handle all those annoying chat messages on Facebook.

Download Chat Undetected

Desktop Sidebar: Get Sidebar For Windows XP

Note: I wrote this in 2012 for Windows XP users who wanted Vista/7-style desktop gadgets. XP hit end of life in 2014, and Microsoft killed off the whole gadget/sidebar category for security reasons not long after. Keeping this post up for nostalgia.

Are you still a Windows XP user? And you love all those sidebar gadgets of Windows Vista and Windows 7? Do you want all those awesome gadgets on your Windows XP’s desktop? No problem Desktop Sidebar will help you.

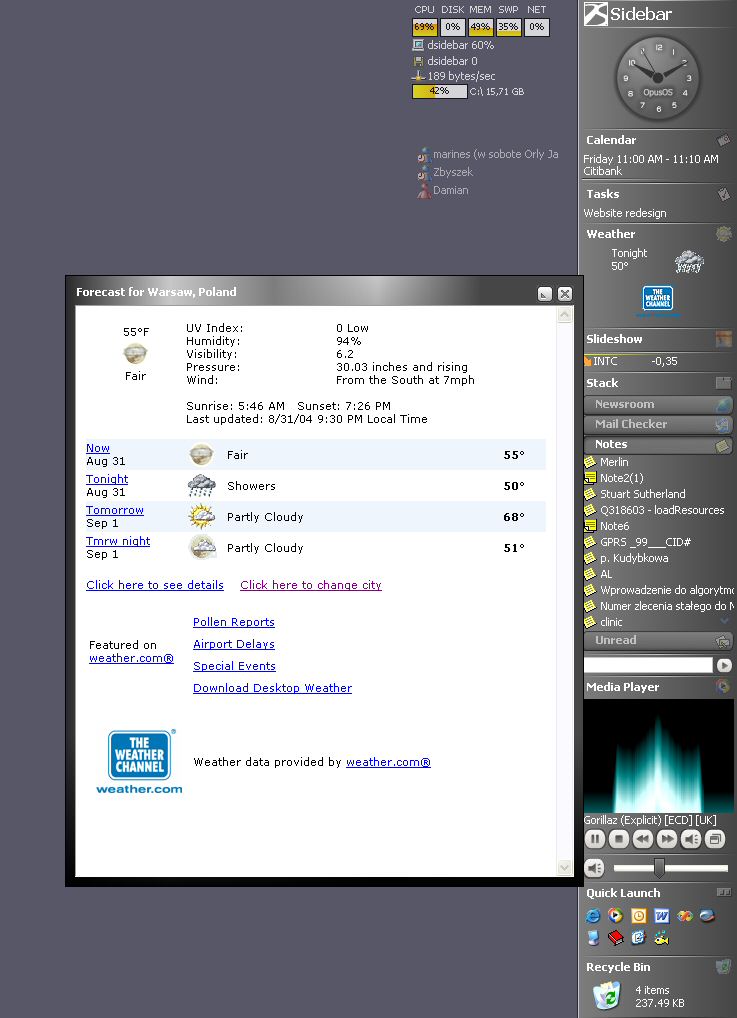
Desktop Sidebar will enable you to place gadgets on your Windows XP’s desktop. Unlike Windows Vista and Windows 7, Desktop Sidebar do not have a huge list of different gadgets but all those which are available are really useful. The pre-installed list of gadgets contains Newsroom, Calender, Tasks, Inbox, Notes, Clock, Media Player, Volume Control, Weather, Search bar, Slideshow and few more. In all there are 13 pre-installed gadgets. Apart from that you can also download various third party gadgets from Extras Page.

Desktop Sidebar
Desktop Sidebar

Best thing is that Desktop Sidebar is freeware. You can download it from following link.

Download Desktop Sidebar

Image via: desktopsidebar.com

How To Enable/Disable Spell Check For All Inputs In Firefox

Note: This post was written in 2012. The good news: this about:config trick still works in modern Firefox. The setting name (layout.spellcheckDefault) and values (0 = off, 1 = multi-line only, 2 = all inputs) remain the same.

If you’re a Firefox user, you’ve probably used its built-in spell checker without even thinking about it. Type a word wrong in a text area and Firefox underlines it in red — just like Microsoft Word. Click it and you get suggestions. Simple enough.

But here’s something most people don’t know: by default, Firefox only runs the spell checker in multi-line text boxes (like the body of an email). Single-line input fields — like username boxes or search bars — are excluded. If you want spell checking to work everywhere, you have to enable it manually.

How to enable spell check for all inputs

  1. Open Firefox and type about:config in the address bar.
    Firefox about:config Address
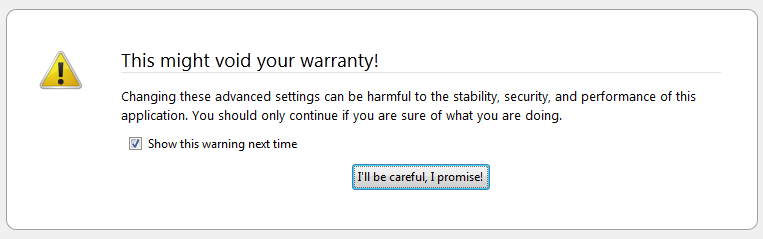
  2. Firefox will warn you that you’re about to enter the advanced settings area and that a wrong change can cause serious issues. Click “I’ll be careful, I promise” to proceed.
    Firefox about:config Warning
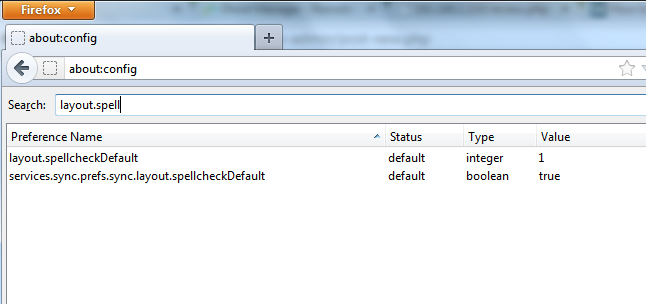
  3. Type layout.spellcheckDefault in the filter field. You’ll see it has a value of 1 by default (spell check active in multi-line boxes only). Double-click it, change the value to 2, and click OK.
    Firefox about:config Spell Check

How to disable spell check entirely

Follow the same steps but in the last step change the value to 0 instead of 2. That turns off spell checking completely.

Having spell check active in every input field takes a little getting used to — it underlines things in places you’re not expecting. But most people who try it end up liking it.

Getting Recent Posts Outside Of WordPress

Many sites do use WordPress for blogging but they do not use it as back-end for whole site. (Your site or app may be one of them.) There may be a scenario in which you have to display recent posts from WordPress blog, on a page which is outside of WordPress. No problem. You might know that WordPress is quite flexible, hence you can handle such scenario with a small code. There are two ways to achieve this. You can either take advantage of WordPress loop itself or if you don’t want to deal with WordPress loop then you can use other way also.

If you don’t want WordPress loop

So you don’t want to take advantage of WordPress loop? Then you can use wp_get_recent_posts(). According to WordPress codex:
wp_get_recent_posts() will return a list of posts. Different from get_posts which returns an array of post objects.
How to use it? Just copy paste following code in page where you want to list the Recent Posts
include( 'wp-load.php' );

// Get the last 10 posts
$recent_posts = wp_get_recent_posts( array(
    'numberposts' => 10,
    'post_type'   => 'post',
    'post_status' => 'publish',
) );

// Display them as list
echo '<ul>';
foreach ( $recent_posts as $post ) {
    echo '<li><a href="', get_permalink( $post['ID'] ), '">', $post['post_title'], '</a></li>';
}
echo '</ul>';
You can simply change numberposts parameters value to change the number of posts you want to retrieve. Continue reading Getting Recent Posts Outside Of WordPress