New Privacy Settings From Facebook

Note: This post was written in 2012 covering a privacy update Facebook rolled out at the time. Facebook has redesigned its privacy interface many times since then, and most of what’s described here has been significantly changed or replaced.

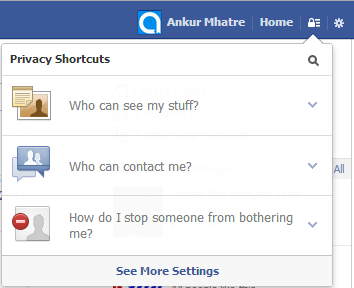
Have you noticed a new privacy shortcut appearing in your Facebook account lately? If you haven’t tried it yet, you should — Facebook just revamped its privacy settings to make them simpler, easier to understand, and more powerful. Here’s a rundown of what’s new.

Privacy Shortcuts

Privacy Shortcuts
Privacy Shortcuts

Facebook has introduced a new Privacy Shortcuts menu. From here you can quickly control who sees your posts, review your activity log, preview your public profile, manage messaging and friend request settings, and block people — all from one convenient place without digging through the full settings.

Continue reading New Privacy Settings From Facebook

Papercut: Set Bing Background As Wallpaper On Windows Phone

Note: This post was written in 2012 for Windows Phone, which Microsoft discontinued in 2017. The Windows Phone Store no longer exists and the download links below no longer work.

If you’re a fan of Bing.com’s daily background images, you’re probably already using the “Best of Bing” theme to get them as your desktop wallpaper on PC. But what about your Windows Phone? That’s where Papercut comes in.

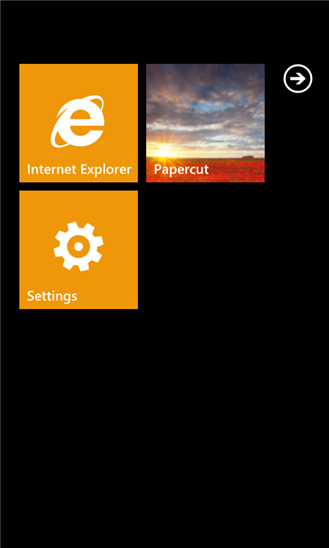
Papercut automatically fetches Bing background images and sets them as your Windows Phone wallpaper. What makes it especially nice is that it doesn’t just pull from one region — it grabs backgrounds from all 10 regional versions of Bing.com, so you get a much wider variety. It also has a Live Tile that shows today’s featured image right on your home screen.

Continue reading Papercut: Set Bing Background As Wallpaper On Windows Phone

Control Your Facebook Timeline

Note: This post was written in 2012 when Facebook’s Timeline was a relatively new feature. Facebook has redesigned its privacy interface multiple times since then. The options described here still exist in some form, but the navigation has changed — look under Settings & Privacy > Settings > Privacy or Profile and Tagging.

Are you frustrated with random tags, unwanted posts, or unknown people seeing things on your timeline? Your friends are tagging you in photos you’d rather not have on your profile? You’re not alone — and the good news is Facebook gives you quite a bit of control over all of this. Most people just don’t know where to look.

How to control your Timeline

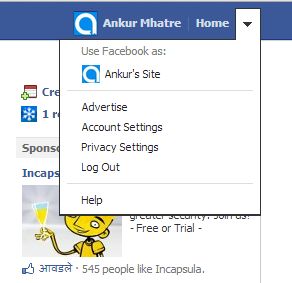
Go to Privacy Settings from the dropdown menu next to your profile link. Scroll down and you’ll find:

  • Timeline and Tagging
  • Ads, Apps and Websites
  • Limit the Audience for Past Posts

Facebook Menu

Continue reading Control Your Facebook Timeline

Avoid Facebook Account Hijacking In 4 Steps

Note: This post was written in 2012. The security steps here are still sound, but Facebook’s interface has changed significantly. Navigation paths like “Account Settings > Security” now look different. All these settings still exist — look for them under Settings & Privacy > Settings > Security and Login.

Facebook is used by you, me, and millions of people around the world to stay connected with friends and family. Most of us use it daily — some of us are probably a little too addicted to it. But here’s a question worth asking: is your Facebook account actually secure? What have you done to protect it?

If you don’t have a good answer, follow these four steps right now.

Step 1: Change Your Password

Change Password

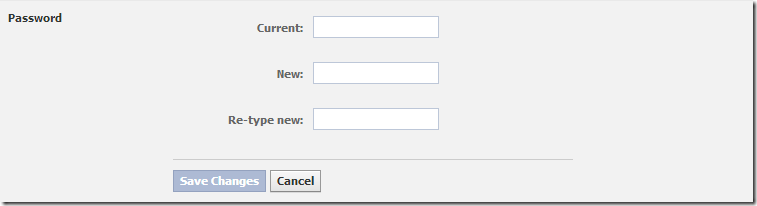
This is the most important step. If you’ve been using the same password for a long time, change it now. Go to Account Settings > General. Make it a habit to update your password every month — it cuts off anyone who may have come across your old one.

Continue reading Avoid Facebook Account Hijacking In 4 Steps

HTML5 Prefetching Api

Note: This post was written in 2012. Link prefetching is still valid, but modern browsers now support more targeted hints like rel="preload", rel="preconnect", and rel="prefetch" — each serving a different purpose. The MDN docs are still the best reference.

Making websites faster is something both developers and browsers are constantly working on. There are plenty of well-known techniques for this — CDNs, minified JavaScript and CSS, image sprites, smart caching headers in .htaccess, and so on. But one lesser-known technique that most developers overlook entirely is link prefetching.

What is link prefetching?

According to MDN:

Link prefetching is a browser mechanism which utilizes browser idle time to download or prefetch documents that the user might visit in the near future. A web page provides a set of prefetching hints to the browser, and after the browser is finished loading the page, it begins silently prefetching specified documents and stores them in its cache. When the user visits one of the prefetched documents, it can be served up quickly out of the browser’s cache.

In simple terms: you hint to the browser which page the user is likely to visit next, and the browser quietly downloads it in the background during idle time. When the user clicks through, the next page loads nearly instantly because it’s already cached.

How to implement it

It’s just a <link> tag with rel="prefetch" or rel="next":

<!-- Prefetch a full page -->
<link rel="prefetch" href="https://ankurm.com/lab/blog/api/using-localhost-for-facebook-app-development/1091/" />

<!-- Prefetch an image -->
<link rel="prefetch" href="https://ankurm.com/wp-content/uploads/2012/03/logo.png" />

Continue reading HTML5 Prefetching Api

How To Completely Uninstall Any Antivirus

Note: This post was written in 2012. Many of the vendor links below are likely outdated or broken. For current removal tools, search for “[AV name] removal tool” on the vendor’s official website.

Uninstalling most programs is simple enough — Control Panel, Programs and Features, Uninstall, done. But antivirus software is a different story. Some AV programs actively block their own removal. And even when you do uninstall through Control Panel, leftover traces can cause problems later: a new antivirus installer might refuse to run, claiming another AV is already present, or it installs but throws errors during operation.

The proper fix is to use each vendor’s dedicated removal tool, which does a thorough cleanup instead of just removing the surface layer. Here’s a list of vendor-specific tools and instructions:

  • AVIRA — Instructions on Avira GmbH’s website.
  • AVG — Instructions on AVG Technologies’ website.
  • Avast — Uninstall utility on Avast’s website.
  • BitDefender — Instructions on BITDEFENDER SRL’s website.
  • CA — Instructions on CA, Inc.’s website.
  • VIPRE — Tool from GFI Software.
  • eScan — Removal tool from MicroWorld Technologies.
  • ESET — Instructions on ESET LLC’s website.
  • F-Secure — Instructions on F-Secure Corporation’s website.
  • F-Prot — Instructions on FRISK Software International’s website.
  • G DATA — Tools on G Data Software AG’s website.
  • K7 — Instructions on K7 Computing’s website.
  • Kaspersky — Instructions on Kaspersky Lab’s website.
  • Kingsoft — Instructions on Kingsoft Research’s website.
  • McAfee — Instructions on McAfee Inc.’s website.
  • Outpost — Instructions on Agnitum Ltd.’s website.
  • Panda — Instructions on Panda Security’s website.
  • Norton — Instructions on Symantec Corporation’s website.
  • Norman — Instructions on Norman ASA’s website.
  • Quick Heal — Instructions on Quick Heal Technologies’ website.
  • Sophos — Instructions on Sophos Ltd.’s website.
  • ThreatFire — Instructions on PC Tools Limited’s website.
  • Trend Micro — Instructions on Trend Micro Incorporated’s website.
  • Webroot — Instructions on Webroot Software Inc.’s website.
  • Windows Security Essentials — Instructions on Microsoft Corporation’s website.
  • Windows Live OneCare — Instructions on Microsoft Corporation’s website.
  • Zone Alarm — Instructions on Check Point Software Technologies’ website.

How to add Gmail and Yahoo accounts in Windows 8 Mail

Note: This post was written in 2012 for Windows 8 Mail. Windows 8 reached end of support in 2016, and the Mail app has since been replaced by the Outlook app in Windows 11. These steps no longer apply to modern Windows.

Windows 8’s Mail app has a fresh, modern look and works great if you’re signed in with a Microsoft account — your Hotmail or Outlook mail shows up automatically. But it also supports Gmail and Yahoo accounts, which is handy. Here’s how to set them up.

Step 1: Sign in to the Windows 8 Mail app with your Microsoft account. If you don’t have one, sign up — you don’t need a new email address, you can use your existing one.

Continue reading How to add Gmail and Yahoo accounts in Windows 8 Mail