System Ninja: Clean Junk Files, Manage Startup & Analyse Your PC

Note: I reviewed System Ninja back in 2012. While it was a great tool at the time, PC cleaning software has changed a lot, and modern versions of Windows handle most of this maintenance automatically!
System Ninja Logo
System Ninja Logo

We all want our PCs running as fast and smoothly as possible. To keep things snappy, you regularly need to clear out the digital clutter. Every time you install, uninstall, or simply use an application, your system generates log files and cached data. These are incredibly useful for software developers trying to debug crashes, but for the average user, they’re just junk taking up valuable hard drive space.

If you’re someone who loves testing out new software, you could easily have thousands of these useless files sitting on your drive, sometimes taking up gigabytes of space. While they aren’t inherently harmful, letting them pile up can lead to low disk space warnings, wasted memory, and occasionally even system instability.

There are thousands of utilities out there claiming to clean up this mess—some paid, some free. Today, I want to highlight a fantastic free tool called System Ninja, built by Singular Labs.

Continue reading System Ninja: Clean Junk Files, Manage Startup & Analyse Your PC
Speed Up Your Site with Chrome Prerendering

Note: I wrote this guide in 2012. While the concept of resource hints is still very important, the specific prerender standard and browser implementations have evolved significantly since then. Modern best practices often rely on prefetch or preload instead.

While exploring the latest web technologies, I came across a fantastic tool for web designers. You might already know that Google Chrome has an option to enable Network Prediction. Google built this feature to dramatically decrease page load times by fetching resources in the background, so when a user clicks a link, the page loads almost instantly. This feature is often referred to as “Instant Pages.”

Here’s a quick video from Google explaining how prerendering works:

What exactly is prerendering?

According to the Google Web Developer Guide:

Prerendering is an experimental feature in Chrome (versions 13 and up) that can take hints from a site’s author to speed up the browsing experience of users. A site author includes an element in HTML that instructs Chrome to fetch and render an additional page in advance of the user actually clicking on it.

Continue reading Speed Up Your Site with Chrome Prerendering

Behind The Scenes: The HJKL Keys

If you’re a Gmail user with keyboard shortcuts enabled, you’ve probably noticed that you can use the j and k keys to navigate through your inbox. Hitting j takes you to an older message, while k moves you to a newer one. This navigation style isn’t unique to Gmail—it’s incredibly popular across the web. You’ll find it on sites like MakeUseOf, Google Reader (RIP), Tumblr, and countless developer-focused applications.

But why specifically J and K? Why not other keys?

The history behind this is actually fascinating. Let’s take a look.

Keyboard of ADM-3A Terminal

Continue reading Behind The Scenes: The HJKL Keys

Turn Your Facebook Timeline Into a Movie

Note: I wrote this back in 2012 when Facebook Timeline was brand new. The “Timeline Movie Maker” service mentioned here has long since been discontinued!

Just a few months ago, Facebook launched a brand new feature called Facebook Timeline, which completely overhauled how our profiles look. Whether you love it or hate it, Timeline is here to stay. But we’re not here to debate the new design; instead, I want to share a really cool website I stumbled across.

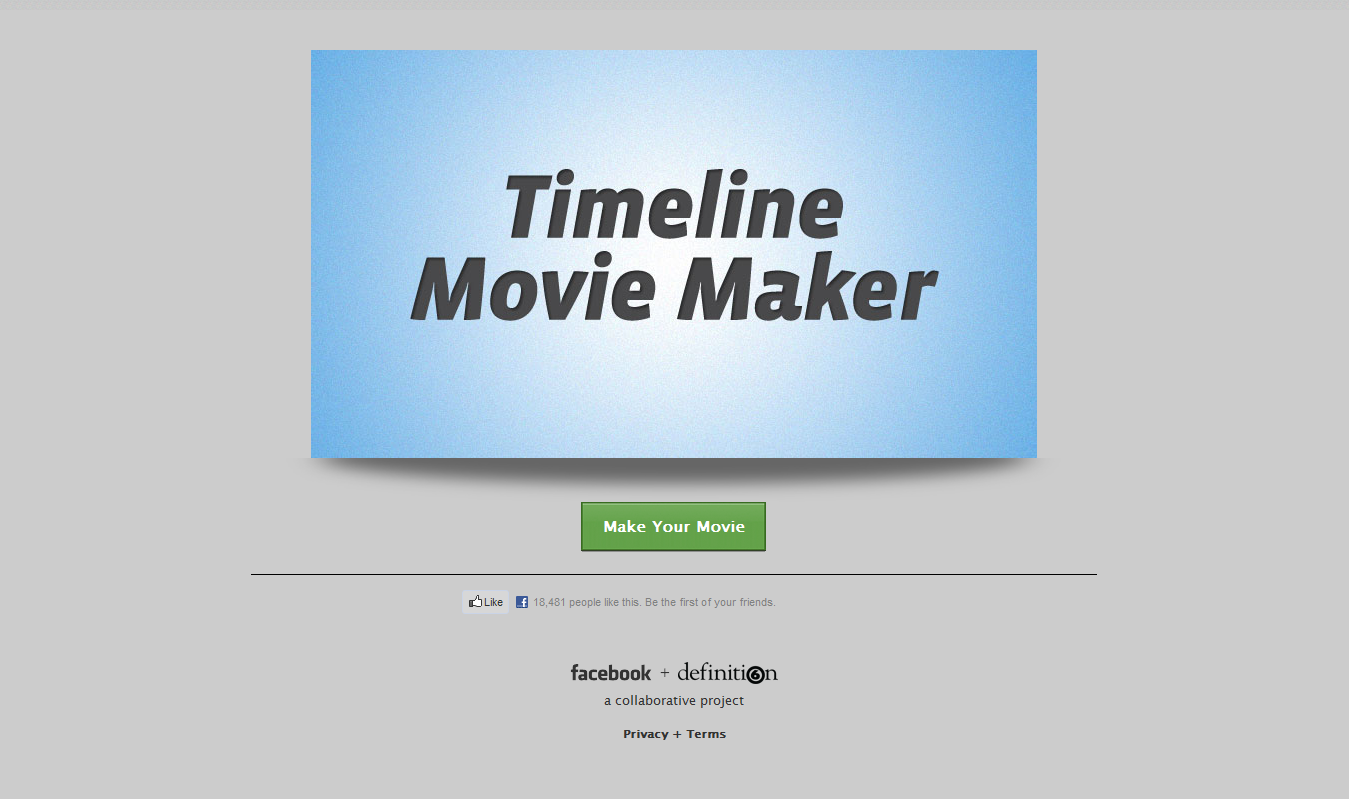
If you’ve already activated Timeline, you should definitely give Timeline Movie Maker a try. It’s a collaborative project between Facebook and Definition that transforms your profile into a beautifully crafted video. It creates an awesome, nostalgic flashback of your life. With just one click, you instantly become a filmmaker.

Timeline Movie Maker: Homepage

Continue reading Turn Your Facebook Timeline Into a Movie

Starting With Oracle SQL

Note: I wrote this guide back in 2012 for Oracle SQL Express Edition 11g. While the command prompt steps are still valid for Oracle databases, the specific software versions and setup screens will look completely different today!

Today, I’m going to show you how to connect to and interact with Oracle SQL directly from your Windows command prompt. You might be wondering why we don’t just use the built-in Run SQL Command Line tool from the Start menu. The big issue with that tool is that it doesn’t support basic copy and paste functionality—something that developers like you and me desperately need! So, let’s look at how to properly connect to your database using the trusty standard command prompt.

First things first, you’ll need to have Oracle SQL installed on your PC. If you don’t have it yet, you can grab it right here:

Download Oracle SQL Express Edition 11g

Oracle SQL Express is completely free to use, but Oracle does require you to log in before downloading. If you don’t have an account, just hit the sign-up button—it’s free and only takes a minute.

The download is fairly hefty at around 350MB. Once it’s finished, extract the ZIP file and run setup.exe. The installation wizard is pretty standard. If you’ve installed Windows software before, you can safely just click “Next” through most of the prompts.

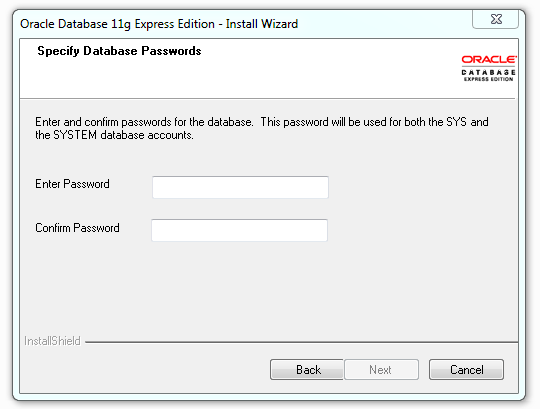
During the setup process, you’ll eventually hit a screen that looks like this:

This is an important step. You’re being asked to set the password for the SYS and SYSTEM users. In Oracle, these are your master administrative accounts. If you’re just setting this up on your local machine for development and learning, I highly recommend using a simple password like admin. It’s easy to remember and quick to type. Of course, you can use whatever password you prefer. Once you’ve typed it in, click Next.

The installer will now begin copying files and setting up your database. Just sit back and wait for it to finish.

Continue reading Starting With Oracle SQL

Folder Colorizer: Change Icon Color Of Any Folder In Windows

Note: I originally wrote this post in 2012. It features an older tool designed for earlier versions of Windows, though the core functionality may still work today!

Folders are the backbone of organizing your files. If you’re a heavy computer user, you probably have hundreds of folders scattered across your drives for all sorts of different projects. When you’re dealing with that many directories, it’s incredibly easy to lose track of the important ones. Plus, let’s be honest—Microsoft’s default yellow folder icons get pretty boring to look at after a while.

If you want to spice up your desktop or just organize your workflow visually, I’ve got a great tool for you.

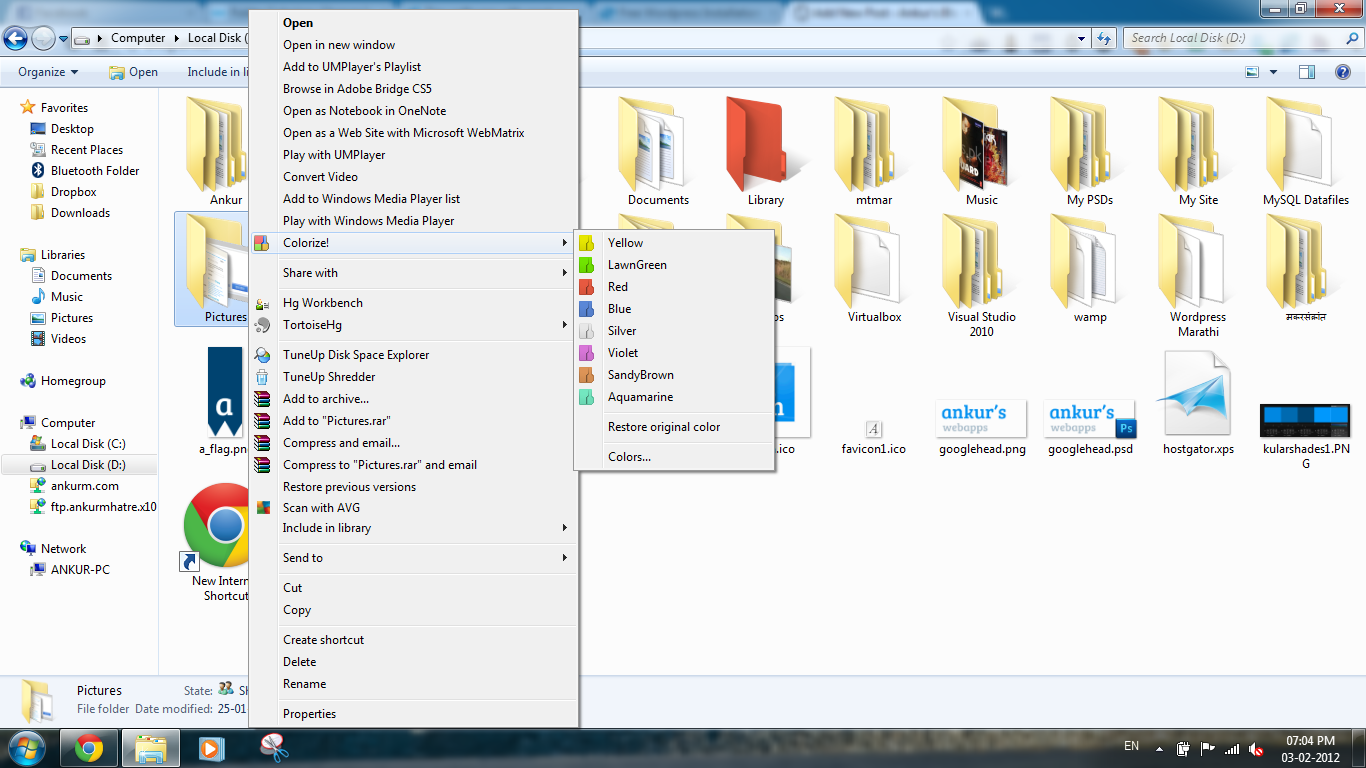
Folder Colorizer is a brilliant little application that lets you change the color of any folder in Windows Explorer with just two clicks. You can grab the download link at the bottom of this post. Once you install it, the app silently integrates into your system and adds a new Colorize! option to your right-click context menu.

To change a folder’s color, simply right-click it, hover over the Colorize! menu, and pick your favorite color. Out of the box, it comes with a nice selection of defaults: Yellow, Lawn Green, Red, Blue, Silver, Violet, Sandy Brown, and Aquamarine.

Folder Colorizer in context menu
Folder Colorizer in Context Menu

Continue reading Folder Colorizer: Change Icon Color Of Any Folder In Windows

Getting Started With Google Web Fonts

Note: I originally wrote this guide in 2012. Google Fonts has since completely overhauled its website design and integration process. While the core concepts remain the same, the screenshots and exact steps below are quite outdated!

Whether you’re writing a simple document, designing a poster, or building a website, typography is absolutely crucial. The right font can completely change the attractiveness and vibe of your work. We all know the classic staples—Times New Roman, Arial, and the rest. They come pre-loaded on your operating system or bundled with your office apps. But because they’re everywhere, they can start to feel a bit boring and uninspired. If you look closely, they don’t really add any unique character to your designs.

So, What’s the Alternative?

You have plenty of options out there. A quick search will bring up tons of font websites, but you’ll quickly run into a major hurdle: the best fonts aren’t free. And the free ones? They often aren’t very interesting. That’s where Google Web Fonts comes to the rescue. It’s a fantastic, massive, and completely free collection of high-quality typography.

You can check it out right here:
google.com/webfonts

A Quick Introduction to Google Web Fonts

Google Web Font Logo

Hosted by Google, this font gallery contains thousands of free web fonts. The collection is huge—over 700 MB and constantly growing. The best part? Every single font is open source. You don’t have to pay a dime, and you don’t need to ask for permission. You’re completely free to download, distribute, and use them anywhere you want, whether it’s for a personal blog or a commercial project.

How Do You Use Them?

So you’ve found a font you absolutely love and want to use it in your next document. Here’s a quick step-by-step guide on how to grab it:

  1. Find the font you want to use.
  2. Add it to your collection.
  3. Download the collection to your PC.
  4. Unzip the downloaded file and install the fonts.

Continue reading Getting Started With Google Web Fonts